Basil Pesto Chicken Pasta
Fresh diced chicken breast with a sauce that will knock your socks off!! Basil pesto pasta with a creamy feta cheese sauce.
I love pesto. I've had my mind blown by the idea of the different tastes that can come from mixing and matching the herbs and nuts used in the pesto, and whether or not you put cheese in it. Mint pecan pesto? Sounds tasty! I love a recipe that Rachael Ray had for parsley pesto. It's cheaper than using basil, and very fresh tasting.
I've mentioned the parsley pesto recipe here but I'm posting it again.
Parsley Pesto
2 cups parsley
3 oz jar or 1/4 c pignoli nuts (I leave these out, they're kind of expensive)
1 clove garlic, cracked away from skin (I generally use 2, we love garlic in our house!)
1/2 cup extra-virgin olive oil
1 tsp black pepper
1 cup grated Parmigiano-Reggiano
Combine parsley, pignoli nuts, and garlic in food processor or blender. Process and stream in about 1/4 cup of the olive oil. Remove paste to a large serving bowl, stir in pepper and grated cheese. Add the rest of the olive oil, stir to combine.
Super easy! Now, there have been times that I've just dumped everything into the blender and it's turned out great, so don't worry so much about the steps, this is really a fuss free dish. It's done in the time it takes to boil the water for the noodles (unless you have a fancy induction cook top, in which case, it's done before the noodles are al dente!)
Here's a recipe for basil pesto which is fantastic, and the best part about it is that it's made in bulk, so as long as you have noodles in your house, you'll always have a quick dinner!
Basic Basil Pesto
3 garlic cloves
1/2 cup toasted pine nuts
1/2 cup Parmesan cheese, grated
1 teaspoon salt
1/2 teaspoon black pepper
3 cups loosely packed fresh basil
2/3 cup good quality olive oil
With food processor running, drop in garlic and finely chop. Stop motor and add nuts, cheese, salt, pepper, and basil, then process until finely chopped. With motor running, add oil slowly, blending until incorporated. Store in a tight container in the fridge for up to a week. Or, put pesto in an ice cube tray and freeze. Store pesto cubes in a frozen bag and use on pasta, chicken and salads throughout the year!
So, for the most flavor, you can marinade the chicken in the basil pesto for 2-12 hours, grill it, then cut it up and toss with noodles and more pesto. I also like the idea of just grilling up the chicken while you're making the pesto in the blender and cooking the noodles, dicing it up, and tossing the whole meal together before serving it. I like this way too because I can reserve some of the chicken and noodles aside in case my youngest decides she hates something suddenly.
Now, if you've been reading this thinking, "But I was promised feta cheese!" I can give you an option for that too, I haven't forgotten that!
Here's what you'll need to pull the sauce together:
1 1/2 cups reduced sodium chicken broth
2 cloves garlic, minced
1 tablespoon olive oil
1 teaspoons cornstarch
3/4 cup prepared basil pesto
1/4 cup chopped fresh basil
3/4 cup crumbled feta cheese
Stir cornstarch into a couple of tablespoons of chicken broth. Stir remaining chicken broth, pesto, and basil into the skillet, mix cornstarch mixture into the sauce, and cook until thickened. Add feta a few minutes before serving.
Showing posts with label Meat. Show all posts
Showing posts with label Meat. Show all posts
Monday, October 11, 2010
Amber Bock Sizzling Steak
Amber Bock Sizzling Steak
Customer Favorite! Our Signature lean and tender bistro steaks marinated in dark beer, brown sugar, and spices. Creates a rich flavor you'll never forget. Bag ***contains soy product
With fall upon us, the days of grilling are coming to a close (or in Arizona they're kicking into high gear!), I figured I'd share this recipe. You can do this under the broiler as well (personally I'd put a sear on it in the frying pan and then finish it off under the broiler if you're going to skip the grill totally)
I found this recipe here. I found another recipe that left out the red wine vinegar, but I think the vinegar is a great addition to the marinade, so I'm sharing this one, but you could always leave it out if you want to (or don't have it!) Now, I want to remind y'all, if you don't like Amber Bock, DON'T use that beer. Use a dark beer that you like, only cook with good booze!
12 ounces of a dark beer such as Amber Bock
3 Cloves of Garlic, Peeled and mashed
1/4 Cup Chopped Onion
1 TSP Fresh Ground Pepper
1/4 TSP Salt
1/4 Cup Vegetable Oil
1/4 TSP Cumin
1/4 TSP Dried Thyme
1/4 cup red-wine vinegar
Whisk together all Ingredients
Place steak in a safe container, such as Tupperware, and pour marinade over the steak
Put a lid on the container, and refrigerate for 6-12 hours, turning the steak over once.
Remove the steak from the marinade, and let it sit for about 1 hour before you grill it. This will bring the temperature of the meat closer to room temperature.
Before lighting the grill, spray on pam to prevent sticking.
Gas Grill Method: If you are using a gas grill, hopefully it has two burners. Heat the grill by turning one of the burners on high, and the other on medium-low. This will allow you to sear the steak and seal in the juices. Place the steak on the hot side of the grill for 1.5-2 minutes. Turn the steak over and cook for 2 minutes. Move the steak to the cooler side of the grill and cook it for about 7-8 minutes for medium rare. The internal temperature should reach about 135F degrees.
Charcoal Grill Method: Build a fire in 1/2 of the pit, and let the charcoal burn down; they will turn white, and you should not be able to hold your hand over the top of the grill for more than 1-2 seconds. Place the steak on the hot side of the grill for 1.5-2 minutes. Turn the steak over and cook for 2 minutes. Move the steak to the cooler side of the grill and cook it for about 7-8 minutes for medium rare. The internal temperature should reach about 135F degrees.
Let the steak rest by placing it on a plate and covering it with foil for about 2 minutes or so. This will help in making the steak tender and juicy because if you cut the steak too early, the juices will be hot, causing them to ooze out.
Now, these tips this recipe gives are really what takes a great steak and puts it over the top. Choosing a good cut, letting it come close to room temp, and letting it rest after cooking ensure a choosy, delicious steak. If you're going to put the time and effort into cooking a steak at home, make it worth your while!
Buffalo chicken
I mentioned buffalo chicken in my last post, and noticed that buffalo chicken was on one of the company's menus!
BUFFALO RANCH CHICKEN
A healthier version of an American favorite! Boneless, skinless, all natural chicken breasts are flavored with a mild Buffalo wing marinade, then grilled or broiled and glazed with a kicked up lite Ranch dressing, finished with a sprinkling of Gorgonzola cheese.
This is the recipe I started making buffalo chicken with.
12 chicken tenders, about 12 ounces
1/2 cup Louisiana hot sauce
1/2 cup all-purpose flour
1 teaspoon kosher salt
1 tablespoon Cajun seasoning
1 tablespoon butter
2 tablespoons vegetable oil
Soak the chicken in the hot sauce in the refrigerator for at least 30 minutes. Put the flour in a pie tin and season with salt and Cajun seasoning. Remove chicken from hot sauce, shake off excess, and dredge chicken in the flour. Set on a baking rack.
Heat the butter and oil in a large skillet over medium heat. When the butter has stopped bubbling, add the chicken tenders and cook until golden and cooked through, about 3 minutes per side. Remove from the pan and drain on paper towels. Serve warm with blue cheese dipping sauce and celery pieces.
I always had a hard time getting the coating to stay on without egg, so I got rid of the coating all together. Now, be careful, we used to just slap it in a frying pan and it was like someone sprayed pepper spray in the house (cooking is about trial and error, that was all error!) I now use my tabletop grill, which, if you don't have one, I highly suggest that you get one. They're fantastic, especially now that we live in Arizona and the last thing we need is something making us warmer!
So basically, my way of cooking it is marinade the chicken in your favorite hot sauce for about an hour (the longer you leave it in, the hotter it gets. Once I left it in for a day, it was almost too hot to eat!) Then I grill it. Healthy, delicious, inexpensive, and quick!
Buffalo Chicken Stuffed French Bread
With football season upon us, I thought this would be a fitting choice of a recipe to find :)
BUFFALO CHICKEN STUFFED FRENCH BREAD
A pub favorite! We've combined flavors of Buffalo Chicken, bacon and Gorgonzola cheese. Stuffed into a crunchy French bread, the flavors melt together to make a tantalizing new baked sandwich! Sliced and served at your next halftime or tailgate party.
I found the recipe very quickly here.
4 boneless chicken breasts
1 cup ranch dressing
1 cup chili sauce
1 cup shredded cheddar cheese
1 loaf French bread
cayenne pepper
Change Measurements: US | Metric
Directions:
Prep Time: 20 mins
Total Time: 35 mins
Cook the chicken breasts (I like to boil them) and then shred with two forks.
Mix cheese, ranch dressing, and chili sauce with the chicken.
Slice the french bread loaf lengthwise. Do not separate the two halves -- just butterfly it. Scoop out the soft bread filling, and break into little bits with your fingers.
Add the bread pieces in with the chicken mix, and stir well to get everything coated nicely.
Spoon all the chicken filling back into the french bread shells. Close the loaf together, and wrap tightly in foil.
Bake at 350 degrees for about 15 minutes to melt the cheese.
When cool enough to handle, slice into rounds about 1 or 2 inches thick.
I'm definitely going to be trying this very soon! My husband loves buffalo chicken, especially mine because it's lower in fat than most places (and cheaper!) so I'm sure this is something he'll love.
Maple glazed roast pork
Here's my next choice of recipe to help others find.
MAPLE GLAZED PORK ROAST
Taste October! Our lean pork loin is roasted and glazed with a delicate blend of maple-flavored syrup, herbs, Dijon mustard and a touch of cider vinegar creating a sweet, yet savory, roast. Cooked until tender and succulent, the aromas fill the house after you pop in the oven and relax.
I found the recipe very quickly on allrecipes.com here
Ingredients
2 1/2 pounds boneless pork loin roast
1 cup real maple syrup
4 tablespoons prepared Dijon-style mustard
2 1/2 tablespoons cider vinegar
2 1/2 tablespoons soy sauce
salt to taste
ground black pepper to taste
Directions
Preheat the oven to 350 degrees F (175 degrees C).
Stir together the maple syrup, mustard vinegar, soy sauce, salt, and pepper in a small bowl. Place pork roast in a shallow roasting pan. Spread glaze evenly over pork roast.
Roast pork in the preheated oven uncovered, until internal temperature measured with a meat thermometer reaches 160 degrees F (70 degrees C), about 1 hour. Remove from oven, and let rest about 10 minutes before slicing to serve.
I will eventually try this, I'm very curious about the taste of it. If anyone tries it, let me know how it turns out!
Tested the recipe
So, I tested the first recipe, it came out pretty good! You didn't really need the butter, but like everything butter touches, it just made it better! We followed the recipe and let it marinade for 4 hours. Here it is on my tabletop grill:

I used breasts that weren't split, I really loved how that one looked like a heart. Grilled chicken is love, hee hee!
This is a pic of the finished grilled chicken:

Yeah, sure, you can eat that with some rice, and vegetables, call it a meal, but I decided to get a little different with it. Using one of the breasts (so half of that heart), I was going to make a salad with a friend. I wanted to grill the romaine (don't gasp with shock, I saw it on the food network and thought, well that could be good!) but she had a new lettuce knife that she was dying to try and got a little overzealous with it. Whatevs, I wasn't dying to try a totally grilled salad! I grilled 2 tomatoes that I cut in half, and an ear of corn. I cut the niblets off the corn and diced the grilled tomatoes, adding them to the romaine lettuce. I cut up the chicken breast and added a Sargento's salad finisher (this one was dried cranberries, pecans, and mozzarella asiago blend), and that was that. You heard me, NO DRESSING. It didn't need it. All the flavors blended and the textures were so great, it didn't need to be covered with anything. My friend agreed. Here's a pic of the salad:

The second way that I made this chicken was cut up and tossed with a stir fried bok choy. I mentioned in a previous post that I made "chicken" and broccoli stir fry. Well, the week that I made this chicken, I also made hot and sour soup. I bought too much bok choy, and had to figure out what to do with it! I enjoyed the glaze on the vegetables in the previous recipe, and since it was just me eating it, I went crazy. I followed the recipe and put the red pepper flakes in it. Umm, yeah, NOT DOING THAT AGAIN! It was super hot. I think I doubled the recipe but still used 1/4 tsp red pepper and it hurt the next day, I'll just put it that way. Here's the recipe again:
2 Tbsp. soy sauce
1 Tbsp. cornstarch
1 Tbsp. distilled white vinegar
1 Tbsp. minced fresh ginger
1 tsp. minced garlic
1/4 tsp. red pepper flakes
1 head bok choy
In a small bowl, combine the soy sauce, cornstarch, vinegar, ginger, garlic, and red pepper flakes. Whisk until combined.
Cut the bok choy into 1/4-inch-thick pieces.
Heat a wok or large skillet over high heat. Add the oil. When almost smoking, add the vegetables, stir-frying for 1 minute. Add the broth and cook, scraping the bottom, until the vegetables are tender.
It was quick, and tasty, working with the sesame, ginger, and soy from the chicken as well. I don't think that I'll be using fresh ginger in this recipe again though, I don't like to bite into fresh ginger, so it'll be ground ginger from here on out!
So there's two other ways to serve this tasty chicken. I used half a breast with the bok choy and that was the perfect lunch size, so we were able to have 8 lunches out of the 4 breasts I marinaded with this. I think that's pretty awesome for those on a budget (we're stressing portion size here, 4 oz of chicken is roughly half a breast.)
I used breasts that weren't split, I really loved how that one looked like a heart. Grilled chicken is love, hee hee!
This is a pic of the finished grilled chicken:
Yeah, sure, you can eat that with some rice, and vegetables, call it a meal, but I decided to get a little different with it. Using one of the breasts (so half of that heart), I was going to make a salad with a friend. I wanted to grill the romaine (don't gasp with shock, I saw it on the food network and thought, well that could be good!) but she had a new lettuce knife that she was dying to try and got a little overzealous with it. Whatevs, I wasn't dying to try a totally grilled salad! I grilled 2 tomatoes that I cut in half, and an ear of corn. I cut the niblets off the corn and diced the grilled tomatoes, adding them to the romaine lettuce. I cut up the chicken breast and added a Sargento's salad finisher (this one was dried cranberries, pecans, and mozzarella asiago blend), and that was that. You heard me, NO DRESSING. It didn't need it. All the flavors blended and the textures were so great, it didn't need to be covered with anything. My friend agreed. Here's a pic of the salad:
The second way that I made this chicken was cut up and tossed with a stir fried bok choy. I mentioned in a previous post that I made "chicken" and broccoli stir fry. Well, the week that I made this chicken, I also made hot and sour soup. I bought too much bok choy, and had to figure out what to do with it! I enjoyed the glaze on the vegetables in the previous recipe, and since it was just me eating it, I went crazy. I followed the recipe and put the red pepper flakes in it. Umm, yeah, NOT DOING THAT AGAIN! It was super hot. I think I doubled the recipe but still used 1/4 tsp red pepper and it hurt the next day, I'll just put it that way. Here's the recipe again:
2 Tbsp. soy sauce
1 Tbsp. cornstarch
1 Tbsp. distilled white vinegar
1 Tbsp. minced fresh ginger
1 tsp. minced garlic
1/4 tsp. red pepper flakes
1 head bok choy
In a small bowl, combine the soy sauce, cornstarch, vinegar, ginger, garlic, and red pepper flakes. Whisk until combined.
Cut the bok choy into 1/4-inch-thick pieces.
Heat a wok or large skillet over high heat. Add the oil. When almost smoking, add the vegetables, stir-frying for 1 minute. Add the broth and cook, scraping the bottom, until the vegetables are tender.
It was quick, and tasty, working with the sesame, ginger, and soy from the chicken as well. I don't think that I'll be using fresh ginger in this recipe again though, I don't like to bite into fresh ginger, so it'll be ground ginger from here on out!
So there's two other ways to serve this tasty chicken. I used half a breast with the bok choy and that was the perfect lunch size, so we were able to have 8 lunches out of the 4 breasts I marinaded with this. I think that's pretty awesome for those on a budget (we're stressing portion size here, 4 oz of chicken is roughly half a breast.)
Thursday, September 23, 2010
First recipe!
SAVORY GRILLED CHICKEN WITH SESAME HONEY BUTTER
Back by popular demand! Our sesame honey butter tops our all natural chicken breasts marinated in a scrumptious blend of sweet sesame, ginger and garlic for a punch of flavor. This moist golden brown chicken is ready in just 15 minutes and is bursting with flavor.
So, when you get through the fancy terms you see sesame honey butter on top of chicken breast that was marinaded in a sesame, ginger and garlic sauce. Pshaw, easy!
Here is a recipe for the chicken.
4 boneless & skinless chicken breasts
3 garlic cloves peeled & crushed
1/2 cup soy sauce
1/4 cup seasoned rice wine vinegar
2 tablespoons honey
1 Tbsp fresh ginger root, peeled and grated
4 medium green onions, chopped
2 tablespoons toasted sesame oil
4-6 sprigs fresh cilantro, rinsed and dried
1 tsp toasted sesame seeds (optional)
Combine the soy sauce, garlic, vinegar, honey, ginger, onions, sesame oil and optional sesame seeds to make a marinade. Pour the marinade into a large plastic zipper baggie. Add the chicken breasts to the baggie, squeeze out the excess air and seal. Transfer the baggie to the refrigerator and allow the chicken to marinate for 3 to 4 hours.
Prepare a grill or grill pan by spraying with a bit of canola cooking spray, then get it very hot. Pick the cilantro leaves off the stems and set aside. Remove chicken from the marinade. Broil or grill 3 to 4 minutes per side, until it is tender and fully cooked. Garnish with cilantro leaves and serve.
Here is the recipe for the butter.
1 cup (2 sticks) salted butter, at room temperature
2 tablespoons honey
1 teaspoon toasted sesame oil*
3 teaspoons lightly toasted sesame seeds† (or a mix of black and white sesame seeds)
*Use toasted sesame oil and sesame seeds to bump up the sesame flavor.
†To toast sesame seeds, place seeds in a single layer on an ungreased, shallow pan. Bake at 350°F for 5 to 10 minutes or until golden brown. Remove from pan to cool.
Preparation
Place the butter in a medium mixing bowl and, with an electric mixer (fitted with the paddle) or wooden spoon, beat until light and fluffy. Scrape down the sides.
Add the honey, sesame oil and sesame seeds and beat to incorporate, scraping down the sides. Taste for salt.
Scrape into a small bowl, serving crock or butter molds and cover tightly; or shape into a long roll in grease-proof paper (plastic, wax or parchment) for storing and slicing as needed.
Ok, don't let the times listed on the sites freak you out. If you're planning your menu for the week and doing prep ahead of time, you can prepare the marinade and put it in a baggie with the chicken ahead of time. It can hang out in the marinade in the freezer and then when it's thawing. The butter is super easy to make, but if you're going for a lighter dish, you can easily leave it off. I'm going to be trying this in the next few days to test out the recipes.
Monday, September 13, 2010
Moroccan chicken
I love trying new dishes (obviously!) and this one seemed like a nice stewed chicken dish with lots of sauce to put over tasty couscous. If you haven't tried couscous yet, it's super simple to make. You can buy it by the ounce at Sprouts for very cheap, and it's quick to make. You use 1 part couscous and 2 parts of water/stock/broth. You bring boil the liquid, add the couscous, make sure it's all in the liquid, turn off the heat, put the cover on, and leave it alone for 5 minutes. You can then fluff it with a fork and it's good to go. It's great for a quick snack or a side dish when you realize that you forgot to make something (or the kids are still hungry!) It's one of the best grain dishes to use, containing protein and more vitamins than pasta and rice.
Here is the recipe.
4 chicken leg quarters, skinned
1 tablespoon olive oil
1 medium onion, cut into chunks
4 garlic cloves, minced
1 tablespoon fresh ginger, minced
2 medium carrots, cut into chunks
1 cup canned chick-peas, drained
1/2 cup golden raisin
2 cinnamon sticks
1 1/2 teaspoons cumin
1/2 teaspoon turmeric
5 cups water
2 medium zucchini, cut into chunks
1/2 teaspoon salt
1/4 teaspoon pepper
2 cups couscous
In a large saucepan or Dutch oven, place olive oil over high heat. Add chicken and cook about 10 minutes, turning to brown on all sides.
Stir in onion, garlic, ginger, carrots, chickpeas, raisins, cinnamon, cumin, turmeric, and water. Bring to a simmer, reduce heat to low and cook about 20 minutes.
Meanwhile make couscous according to directions on package and divide among 4 serving bowls and set aside.
Stir in zucchini to the chicken in the pot, and cook about 10 minutes more. Remove cinnamon sticks and add salt and pepper. Serve chicken over the couscous with sauce spooned over.
I made some changes to this dish. I knew my husband wouldn't eat it if it had raisins in it, so those weren't added. The chicken leg quarters didn't thaw in time, so we ran to the store and got some chicken thighs to use instead (because we couldn't find chicken leg quarters.) I pretty much did the rest of the recipe as it's written, using my vegetable bouillon to make the couscous (seriously, make the bouillon, there are so many applications for it, and it's nice to have in the freezer when you need stock or broth and realize you have none!)
Here is a picture of it:

The changes that I would make in the future would be to leave the zucchini and chickpeas out (per the hubby's request), and use boneless skinless chicken breast, so that we don't have to worry about skin sticking to my pan! Other than that, it's a tasty dish. My 5 year old loved it, and my 2 year old ate it without complaining, so win for me!
Here is the recipe.
4 chicken leg quarters, skinned
1 tablespoon olive oil
1 medium onion, cut into chunks
4 garlic cloves, minced
1 tablespoon fresh ginger, minced
2 medium carrots, cut into chunks
1 cup canned chick-peas, drained
1/2 cup golden raisin
2 cinnamon sticks
1 1/2 teaspoons cumin
1/2 teaspoon turmeric
5 cups water
2 medium zucchini, cut into chunks
1/2 teaspoon salt
1/4 teaspoon pepper
2 cups couscous
In a large saucepan or Dutch oven, place olive oil over high heat. Add chicken and cook about 10 minutes, turning to brown on all sides.
Stir in onion, garlic, ginger, carrots, chickpeas, raisins, cinnamon, cumin, turmeric, and water. Bring to a simmer, reduce heat to low and cook about 20 minutes.
Meanwhile make couscous according to directions on package and divide among 4 serving bowls and set aside.
Stir in zucchini to the chicken in the pot, and cook about 10 minutes more. Remove cinnamon sticks and add salt and pepper. Serve chicken over the couscous with sauce spooned over.
I made some changes to this dish. I knew my husband wouldn't eat it if it had raisins in it, so those weren't added. The chicken leg quarters didn't thaw in time, so we ran to the store and got some chicken thighs to use instead (because we couldn't find chicken leg quarters.) I pretty much did the rest of the recipe as it's written, using my vegetable bouillon to make the couscous (seriously, make the bouillon, there are so many applications for it, and it's nice to have in the freezer when you need stock or broth and realize you have none!)
Here is a picture of it:
The changes that I would make in the future would be to leave the zucchini and chickpeas out (per the hubby's request), and use boneless skinless chicken breast, so that we don't have to worry about skin sticking to my pan! Other than that, it's a tasty dish. My 5 year old loved it, and my 2 year old ate it without complaining, so win for me!
Tasty steak marinade
At the beginning of September I went to a bunch of the stores having meat sales and stocked up. I think I spent about $150 and got a month's worth of meat hanging out in my chest freezer (which is full, yay!) I was looking for different ways to make the meat, even though the hubby would love it if we just grilled it with some spices and served it with rice and a vegetable. I'm not down with that! I found this recipe and I used it on a ribeye (because Kevin didn't want to dig around to get the sirloin!) He was worried he wouldn't like the steak, so he took out 2 and asked me to only marinade one. Sure, no problem, but you're seasoning the other steak. I followed this recipe for the marinade and it was super tasty.
1/4 cup honey
3 tablespoons reduced-sodium soy sauce
2 tablespoons olive oil
1 tablespoon balsamic vinegar
2 garlic cloves, peeled
1/4 teaspoon coarsely ground pepper
2 (5 ounce) boneless beef sirloin steaks
3 green onions, sliced
In a blender, combine the honey, soy sauce, oil, vinegar, garlic and pepper; cover and process until blended. Pour 1/3 cup marinade into a large resealable plastic bag; add steaks and onions. Seal bag and turn to coat; refrigerate for at least 1-2 hours. Cover and refrigerate remaining marinade for basting.
Coat grill rack with nonstick cooking spray before starting the grill. Drain and discard marinade. Grill steaks until they're done to your liking.
I used my indoor grill for this, and it doesn't have a cover, so I couldn't follow the recipe exactly, and I didn't baste it, but that wasn't an issue because it was juicy and flavorful!
Here's a picture of the steaks. Top is not marinaded, bottom is.

The best part is that Kevin liked the marinade! The simple seasoned and grilled steak was forgotten, poor thing. He ate it for lunch later in the week (as did we, we're really trying to focus on our portion sizes, so most of the time a single steak will be a meal for the 4 of us.) The marinade really helped get those lovely grill marks that people look for, more so than the simple seasoned one.
1/4 cup honey
3 tablespoons reduced-sodium soy sauce
2 tablespoons olive oil
1 tablespoon balsamic vinegar
2 garlic cloves, peeled
1/4 teaspoon coarsely ground pepper
2 (5 ounce) boneless beef sirloin steaks
3 green onions, sliced
In a blender, combine the honey, soy sauce, oil, vinegar, garlic and pepper; cover and process until blended. Pour 1/3 cup marinade into a large resealable plastic bag; add steaks and onions. Seal bag and turn to coat; refrigerate for at least 1-2 hours. Cover and refrigerate remaining marinade for basting.
Coat grill rack with nonstick cooking spray before starting the grill. Drain and discard marinade. Grill steaks until they're done to your liking.
I used my indoor grill for this, and it doesn't have a cover, so I couldn't follow the recipe exactly, and I didn't baste it, but that wasn't an issue because it was juicy and flavorful!
Here's a picture of the steaks. Top is not marinaded, bottom is.
The best part is that Kevin liked the marinade! The simple seasoned and grilled steak was forgotten, poor thing. He ate it for lunch later in the week (as did we, we're really trying to focus on our portion sizes, so most of the time a single steak will be a meal for the 4 of us.) The marinade really helped get those lovely grill marks that people look for, more so than the simple seasoned one.
Monday, July 26, 2010
Chicken parmigiana, awww yeah!
My husband has been out of town, so I invited 2 ladies that I know over for dinner, and decided to make chicken parmigiana. Most of the time when I make chicken parm, I'll take some shortcut, whether it be prebreaded chicken or bottled sauce, but this time I decided that I wanted to go all the way. I wanted to make the sauce and the chicken myself. I've been reading a lot lately about the benefits of brining poultry before cooking, the two biggies were that it speeds up cooking time and it almost guarantees (if you don't overcook it) a moist piece of meat. Here's what I did:
1 gallon cold water
1 cup kosher salt
1/2 cup sugar
Healthy sprinkling of Italian seasoning (I like the mixture of basil, oregano, thyme and margoram)
I boiled half a gallon of cold water, the salt, sugar, and Italian seasoning. I let it cool for a little while then added the other half gallon. I poured some of the brine in a ziploc baggie with the 4 chicken breasts I was going to use for the parm and put it in the fridge for at least 30 minutes.
While the brine was doing it's job, I prepared some roasted garlic for the sauce. My base sauce recipe (what I go off of and add to it as I see fit) calls for 2 cloves of garlic, but I think that's really weak! I'd been wanting to roast garlic for awhile, and now that I've done it, I'm definitely doing it more often (after I buy more garlic!) It takes the bite out of the garlic and leaves a deep comforting flavor. Eating a garlic clove would be disgusting, but if it's roasted, you wouldn't have a problem with it!
I took about 3/4 of a head of garlic, cut the bottoms off, and separated it into individual cloves. Then I put in it a pocket of tin foil, drizzled olive oil on it, and closed up the tin foil pocket. I roasted it at 250 degrees for an hour, and when it was done the roasted garlic came out of the paper skin easily.
So, now it's time for the sauce! 2 turns of a saucepan of olive oil, add a few cloves of chopped garlic and 1/2 a yellow onion. Cook over low heat for 15 minutes, don't let it brown! Add 28 oz can of crushed tomatoes, the roasted garlic, and then I like to blend it so I don't have to worry about picky eaters getting mad that I didn't cut the onions smaller (while my eyes are burning and tears are streaming down my face... onion cutting isn't something I like to do!) I then drain a 14 oz can of diced tomatoes (I like the fire roasted ones) and add it to the sauce for texture. Add as much basil as you like (tear it or cut it, I like to cut it into strips myself), salt and pepper.
Now the chicken!
Take your chicken out of the brine and pat it dry. Beat 2 large egg whites, and coat the chicken breasts with the egg whites, then coat in a mixture of 1 cup of bread crumbs (I used panko) and 2 tbsp of Italian seasoning. A little olive oil and a screaming hot pan, 4 minutes on each side. While the chicken is cooking, spray your baking pan with some cooking spray (or coat with oil) and put a little sauce along the bottom. Place chicken in the dish and pour remaining sauce evenly over the chicken. Sprinkle with mozzarella cheese and bake until bubbly, about 25 minutes.
I served mine with garlic bread and spaghetti noodles. My 2 year old was shoving it into her mouth while asking if she could have some of mine. My 5 year old was scarfing it down. Sometimes chicken parm comes out with dry chicken, but the brine really helps.
Shopping list!
Chicken breast
kosher salt
sugar
Italian seasoning
Garlic
Olive Oil
Eggs
Panko bread crumbs
Shredded mozzarella cheese
Onion
28 oz can crushed tomatoes
14 oz can diced tomatoes
Fresh basil
Parmesan cheese
Seriously though, go to the link above (brine's job), there's a lot of good information on brining.
Monday, March 1, 2010
Yummy Lenten meal
I grew up Catholic, and while I don't go to church at the moment, old habits die hard. I find myself very focused on no meat on Fridays. If you go out to eat, especially in the Midwest, it's very common to see fish fries as the Friday special, most are all you can eat. I love a good grilled salmon fillet, or nice piece of rare-ish tuna (if it's of good quality) most of the time, but I found myself looking for inspiration this Friday for something that didn't cost too much to make. I had a bag of shrimp in my freezer, so I thawed that and tossed it with elbow macaroni in a parsley pesto recipe that I got from 30 Minute Meals' "Pop-sta Bar" episode. Having used this recipe before, I was pretty sure it was going to be good.
For the most part, parsley is very inexpensive, certainly much less expensive than basil (unless you grow your own.) Leaving out the pine nuts makes it even less expensive, and more allergen friendly. You can drizzle this sauce over chicken, fish, it's a great way to make a different kind of garlic bread (spread on the bread and bake until crispy), it's very versatile. It also whips up in a snap, so if you're pressed for time and want to wow someone with something a little more difficult than opening up a can or ordering take out, this is just the thing! Here's the recipe:
Parsley Pesto
2 cups parsley
3 oz jar or 1/4 c pignoli nuts (again, I leave these out)
1 clove garlic, cracked away from skin (I generally use 2, we love garlic in our house!)
1/2 cup extra-virgin olive oil
1 tsp black pepper
1 cup grated Parmigiano-Reggiano
Combine parsley, pignoli nuts, and garlic in food processor or blender. Process and stream in about 1/4 cup of the olive oil. Remove paste to a large serving bowl, stir in pepper and grated cheese. Add the rest of the olive oil, stir to combine.
Super easy! Now, there have been times that I've just dumped everything into the blender and it's turned out great, so don't worry so much about the steps, this is really a fuss free dish. It's done in the time it takes to boil the water for the noodles (unless you have a fancy induction cook top, in which case, it's done before the noodles are al dente!)
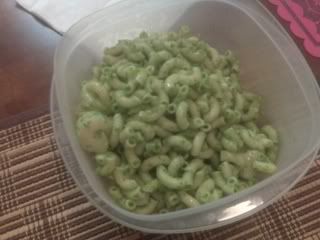
That's a shrimp there on the left. If you have a restaurant nearby called Noodles & Company, they have a dish called Pesto Cavatappi that can be easily replicated with this recipe, adding a little cream, some mushrooms, and tomato with cavatappi noodles. Personally, I'd leave out the cream, and any addition of veggies can only make it healthier.
Sorry for the unglamorous photo, it was a rushed dinner prep and I didn't get the chance to photo it before we ate, these are the leftovers. I'm surprised that little shrimpy made it for the leftovers ;)
For the most part, parsley is very inexpensive, certainly much less expensive than basil (unless you grow your own.) Leaving out the pine nuts makes it even less expensive, and more allergen friendly. You can drizzle this sauce over chicken, fish, it's a great way to make a different kind of garlic bread (spread on the bread and bake until crispy), it's very versatile. It also whips up in a snap, so if you're pressed for time and want to wow someone with something a little more difficult than opening up a can or ordering take out, this is just the thing! Here's the recipe:
Parsley Pesto
2 cups parsley
3 oz jar or 1/4 c pignoli nuts (again, I leave these out)
1 clove garlic, cracked away from skin (I generally use 2, we love garlic in our house!)
1/2 cup extra-virgin olive oil
1 tsp black pepper
1 cup grated Parmigiano-Reggiano
Combine parsley, pignoli nuts, and garlic in food processor or blender. Process and stream in about 1/4 cup of the olive oil. Remove paste to a large serving bowl, stir in pepper and grated cheese. Add the rest of the olive oil, stir to combine.
Super easy! Now, there have been times that I've just dumped everything into the blender and it's turned out great, so don't worry so much about the steps, this is really a fuss free dish. It's done in the time it takes to boil the water for the noodles (unless you have a fancy induction cook top, in which case, it's done before the noodles are al dente!)
That's a shrimp there on the left. If you have a restaurant nearby called Noodles & Company, they have a dish called Pesto Cavatappi that can be easily replicated with this recipe, adding a little cream, some mushrooms, and tomato with cavatappi noodles. Personally, I'd leave out the cream, and any addition of veggies can only make it healthier.
Sorry for the unglamorous photo, it was a rushed dinner prep and I didn't get the chance to photo it before we ate, these are the leftovers. I'm surprised that little shrimpy made it for the leftovers ;)
Subscribe to:
Posts (Atom)