Here is my birth story with my youngest, Lana:
I woke up Sunday at around 7:15 with a few little back pains, but I
figured they would go away. We had Mexican food Saturday night to
celebrate Kevin's birthday, so I figured it would go away when I
finally passed some gas (I had been having a lot of "contractions"
that ended up being from needing to fart, so I tried not to get my
hopes up.) I went to the bathroom and they didn't stop after I'd
farted, and I had really bad bloody show (like I was getting ready to
start my period), so I told dh and he was timing the contractions for
me. I got into the shower but he didn't stay there, and in my 15
minute shower I had 4 really powerful contractions (all in my back.)
I got out, got dressed and went downstairs. We figured they were
about 5 minutes apart, so I called the midwife who said she'd have to
call me back. My MIL and mom were here, so they were getting ready
for the day, and when they had finished getting ready before I got a
call back from the midwife, we decided to go ahead and go to the
birth center. We made Emily some french toast sticks and bagged some
cereal and headed out the door. I called again and talked to Kel, my
regular midwife, who said to come on in and get checked. We got there
at about 8 am and waited for awhile, another family was there, and we
talked to them in the waiting room. Their mama had the baby at 7:15,
but she needed stitches, so Kel was finishing up on those.
We realized they didn't see us come in, so my mom went out and rang
the doorbell to let them know we were here, and the birth assistant
came out, telling me Kel was finishing up, so we went to an exam room
and waited. She came out and checked me, saying that she wasn't sure
I was in labor because I was only 3-4 cm dilated and 90% effaced
(thank you EPO!) so she said I should go to the back labor room and
hang out for an hour or two, that she'd come to check on me and see
how things were going. I decided to have Emily snuggle and nurse to
make sure things kept going, and to have our last moments of her as
an only child before labor got really intense. She came back in about
an hour and said I was at 4-5 cm, still 90% effaced, but that there
was definitely something going on so she was going to admit us (which
at the Birth Center basically means we get to stay, lol. No paperwork
or anything.) When I got to 5 cm, I decided to try out the birthing
tub because the contractions were all in my back (even though baby
wasn't posterior) and Kevin tried sacral (sp?) pushes to counteract
the pressure, which helped a lot. Emily was in the room up to that
point, she had been nursing to jump start labor (while we were there
for the first hour, before we were admitted) and she had been doing
the breathing with me, she'd say, "Mama!" and then blow, blow, blow.
It was pretty cute. While I was waiting for the tub to fill up I was
sitting on the toilet in the bathroom and she would dip her hands in
the water and run over to put them on my belly. I was amazed at how
perceptive she was. My MIL and mom went off in search of swim
diapers, just in case, but Emily ended up leaving the room before I
got into the tub and didn't come back until the baby was born.
I labored in the tub for about an hour when I decided to try getting
out and doing other positions. We tried the dance position (leaning
against dh with arms around his neck) and I didn't really like that,
then we tried laying in bed on my side, on the birth ball while
rotating my hips, on hands and knees, butt in the air, every little
position I could think of, I tried it, and quickly discarded it after
each contraction. We refilled the tub with warm water and I got back
in like a woman on a mission (my midwife laughed at how fast I walked
back to the tub.) I progressed fairly quickly in the tub, my midwife
told me to try to butterfly my legs to make my pelvis bigger, so with
each contraction I did that and leaned forward while dh did some
symmetrical hand movements on my back. We did this position where I
leaned over the edge of tub, while still in it, my arm pits were
against the top of the edge of the tub, and I was holding myself up
with my knees, spread wide apart to get gravity into things. I felt
the need to push, but my midwife said I was only 8 cm and had a
little lip of cervix left, so I could do little baby pushes. The baby
pushes were not what my body was telling me to do, so she told me I
wasn't allowed to push anymore (bad mama, not listening!) so she told
me to do these little breaths where you pretend like you're blowing a
feather up, that it keeps you from pushing. She checked me again and
said I was at 9 cm, a little cervix left, but that there was a bag of
water in the way, so I laid back and she broke my water for me, which
came out clear. I got back into position at the end of the tub, and
got ready to push (she told me that if I felt like I needed to push
that I could.) With the next contraction I started pushing, and it
burned pretty bad, but I felt her head coming down the birth canal,
and the midwife said she was crowning. I couldn't get her out with
that contraction, and I felt pretty frustrated when I felt her head
go back in, but with the next contraction I tried to push the entire
time. Kel said that the head was out and she needed to do something
with the cord (I think move it so that she could have better access
at the baby) and then gave me the go to finish pushing and she was
out! I asked dh what time it was and he said 12:12 pm. We drained the
tub and I held baby while we waited for the placenta to be delivered
and for the cord to stop pulsing. While we were waiting, Lana decided
it was time to poop, and pooped for about 5 minutes straight (the
midwife and birth assistant were laughing because she just kept
pooping!) Kel checked me and said that I had two really small tears
that didn't need stitches (not bleeding, they were overlapping
themselves already so they would heal quickly) and that I looked
perfect. Lana has some bruising on her face, but other than that,
she's perfect. She just squeaked by needing a blood sugar test,
weighing in at 9 lbs 13 oz. She doesn't fit any of the newborn sized
cloth diapers I made and we had to loosen the straps on her car seat,
we were totally not prepared for a baby her size.
There were times during the labor that I thought I couldn't do it, in
fact I told my midwife and Kevin that I couldn't, but they just kept
telling me I could. I think I was 7 cm when I told them I wanted
drugs (to which my midwife said, "We don't have any drugs." which
they didn't, and I'm eternally grateful for because I was probably an
hour away from delivering her and would have kicked myself forever
after that!) I told Kevin he has to go get me a medal now, lol.
10/21/07 - 12:12 pm - 9 lbs 13 oz - 22 inches
Thursday, October 21, 2010
Thursday, October 14, 2010
Birthday cake plans!
My 2 year old is turning 3 at the end of the month, and it's my husband's birthday the day before hers. His fave cake is red velvet, so I've been on the hunt for a dye free red velvet cake recipe (it was shared on my facebook in February, but I don't want to sift through 8 months of posts to find it!) I found one that looks tasty, and I'm going to fill them with the ganache from a second recipe. Here's the dye free cake recipe:
Natural Red Velvet Cupcakes
1 1/4 Cups All Purpose Flour
1 Cup Granulated Sugar
2 Tablespoons Natural Cocoa Powder*
1 Teaspoon Baking Powder
1/4 Teaspoon Salt
1 8.25-Ounce Can Water-Packed Sliced Beets
1/3 Cup Canola Oil
1/4 Cup Lemon Juice
1 Teaspoon Vanilla Extract
*VERY important, do not use dutch processed for this recipe
Preheat your oven to 350 degrees and line 12 cupcake tins with papers.
In a large bowl, whisk together the flour, sugar, cocoa, baking powder, and salt so that all of the ingredients are evenly dispersed throughout the mixture. Set aside.
Get out your food processor or blender, and toss the entire contents of the can of beets, water included, into the machine. Process the beets for a solid 2 – 4 minutes, depending on how powerful your machine is, until completely smooth. Add in the oil, lemon juice, and vanilla, and pulse briefly to incorporate.
Pour the beet mixture into the bowl of dry ingredients, and mix just enough to combine. Equally distribute the batter between your prepared tins, and bake for 18 – 22 minutes, until a toothpick inserted into the center comes out clean. Let cool completely before applying the mandatory “cream cheese” frosting.
Here is the recipe for the ganache:
Ganache Ingredients
6 ounces bittersweet chocolate
2 cups heavy cream OR Silk creamer OR homemade Almond Creamer
Melt chocolate into cream in a double boiler over low heat, stirring constantly. pour into a large bowl and set in the fridge to cool, about 30 minutes. This should be thin enough to pipe but thick enough to hold a shape. Place into an icing bag fitted with the largest star tip or a filling tip.
Take a toothpick and poke the top of each cupcake. Swirl the toothpick around to create a ‘hole’ in the center of each cupcake, disturbing as little of the surface as possible. Pipe about 1 1/2 tbsp. of ganache into the center of each cupcake.
And of course, the necessary cream cheese frosting:
Cream Cheese Frosting Ingredients
1/2 cup butter or margarine
8 oz. cream cheese OR Tofutti Cream Cheese OR cultured nut cheese
3 cups powdered sugar
1 tsp. vanilla extract
Cream butter or margarine and cream cheese together until smooth. Add vanilla extract and beat till very smooth. Add powdered sugar. Spoon into piping bag and pipe onto cupcakes.
Return cupcakes to fridge for 30 minutes to set the frosting.
Sprinkle with red sugar, if desired.
Monday, October 11, 2010
Basil Pesto Chicken Pasta
Basil Pesto Chicken Pasta
Fresh diced chicken breast with a sauce that will knock your socks off!! Basil pesto pasta with a creamy feta cheese sauce.
I love pesto. I've had my mind blown by the idea of the different tastes that can come from mixing and matching the herbs and nuts used in the pesto, and whether or not you put cheese in it. Mint pecan pesto? Sounds tasty! I love a recipe that Rachael Ray had for parsley pesto. It's cheaper than using basil, and very fresh tasting.
I've mentioned the parsley pesto recipe here but I'm posting it again.
Parsley Pesto
2 cups parsley
3 oz jar or 1/4 c pignoli nuts (I leave these out, they're kind of expensive)
1 clove garlic, cracked away from skin (I generally use 2, we love garlic in our house!)
1/2 cup extra-virgin olive oil
1 tsp black pepper
1 cup grated Parmigiano-Reggiano
Combine parsley, pignoli nuts, and garlic in food processor or blender. Process and stream in about 1/4 cup of the olive oil. Remove paste to a large serving bowl, stir in pepper and grated cheese. Add the rest of the olive oil, stir to combine.
Super easy! Now, there have been times that I've just dumped everything into the blender and it's turned out great, so don't worry so much about the steps, this is really a fuss free dish. It's done in the time it takes to boil the water for the noodles (unless you have a fancy induction cook top, in which case, it's done before the noodles are al dente!)
Here's a recipe for basil pesto which is fantastic, and the best part about it is that it's made in bulk, so as long as you have noodles in your house, you'll always have a quick dinner!
Basic Basil Pesto
3 garlic cloves
1/2 cup toasted pine nuts
1/2 cup Parmesan cheese, grated
1 teaspoon salt
1/2 teaspoon black pepper
3 cups loosely packed fresh basil
2/3 cup good quality olive oil
With food processor running, drop in garlic and finely chop. Stop motor and add nuts, cheese, salt, pepper, and basil, then process until finely chopped. With motor running, add oil slowly, blending until incorporated. Store in a tight container in the fridge for up to a week. Or, put pesto in an ice cube tray and freeze. Store pesto cubes in a frozen bag and use on pasta, chicken and salads throughout the year!
So, for the most flavor, you can marinade the chicken in the basil pesto for 2-12 hours, grill it, then cut it up and toss with noodles and more pesto. I also like the idea of just grilling up the chicken while you're making the pesto in the blender and cooking the noodles, dicing it up, and tossing the whole meal together before serving it. I like this way too because I can reserve some of the chicken and noodles aside in case my youngest decides she hates something suddenly.
Now, if you've been reading this thinking, "But I was promised feta cheese!" I can give you an option for that too, I haven't forgotten that!
Here's what you'll need to pull the sauce together:
1 1/2 cups reduced sodium chicken broth
2 cloves garlic, minced
1 tablespoon olive oil
1 teaspoons cornstarch
3/4 cup prepared basil pesto
1/4 cup chopped fresh basil
3/4 cup crumbled feta cheese
Stir cornstarch into a couple of tablespoons of chicken broth. Stir remaining chicken broth, pesto, and basil into the skillet, mix cornstarch mixture into the sauce, and cook until thickened. Add feta a few minutes before serving.
Amber Bock Sizzling Steak
Amber Bock Sizzling Steak
Customer Favorite! Our Signature lean and tender bistro steaks marinated in dark beer, brown sugar, and spices. Creates a rich flavor you'll never forget. Bag ***contains soy product
With fall upon us, the days of grilling are coming to a close (or in Arizona they're kicking into high gear!), I figured I'd share this recipe. You can do this under the broiler as well (personally I'd put a sear on it in the frying pan and then finish it off under the broiler if you're going to skip the grill totally)
I found this recipe here. I found another recipe that left out the red wine vinegar, but I think the vinegar is a great addition to the marinade, so I'm sharing this one, but you could always leave it out if you want to (or don't have it!) Now, I want to remind y'all, if you don't like Amber Bock, DON'T use that beer. Use a dark beer that you like, only cook with good booze!
12 ounces of a dark beer such as Amber Bock
3 Cloves of Garlic, Peeled and mashed
1/4 Cup Chopped Onion
1 TSP Fresh Ground Pepper
1/4 TSP Salt
1/4 Cup Vegetable Oil
1/4 TSP Cumin
1/4 TSP Dried Thyme
1/4 cup red-wine vinegar
Whisk together all Ingredients
Place steak in a safe container, such as Tupperware, and pour marinade over the steak
Put a lid on the container, and refrigerate for 6-12 hours, turning the steak over once.
Remove the steak from the marinade, and let it sit for about 1 hour before you grill it. This will bring the temperature of the meat closer to room temperature.
Before lighting the grill, spray on pam to prevent sticking.
Gas Grill Method: If you are using a gas grill, hopefully it has two burners. Heat the grill by turning one of the burners on high, and the other on medium-low. This will allow you to sear the steak and seal in the juices. Place the steak on the hot side of the grill for 1.5-2 minutes. Turn the steak over and cook for 2 minutes. Move the steak to the cooler side of the grill and cook it for about 7-8 minutes for medium rare. The internal temperature should reach about 135F degrees.
Charcoal Grill Method: Build a fire in 1/2 of the pit, and let the charcoal burn down; they will turn white, and you should not be able to hold your hand over the top of the grill for more than 1-2 seconds. Place the steak on the hot side of the grill for 1.5-2 minutes. Turn the steak over and cook for 2 minutes. Move the steak to the cooler side of the grill and cook it for about 7-8 minutes for medium rare. The internal temperature should reach about 135F degrees.
Let the steak rest by placing it on a plate and covering it with foil for about 2 minutes or so. This will help in making the steak tender and juicy because if you cut the steak too early, the juices will be hot, causing them to ooze out.
Now, these tips this recipe gives are really what takes a great steak and puts it over the top. Choosing a good cut, letting it come close to room temp, and letting it rest after cooking ensure a choosy, delicious steak. If you're going to put the time and effort into cooking a steak at home, make it worth your while!
Buffalo chicken
I mentioned buffalo chicken in my last post, and noticed that buffalo chicken was on one of the company's menus!
BUFFALO RANCH CHICKEN
A healthier version of an American favorite! Boneless, skinless, all natural chicken breasts are flavored with a mild Buffalo wing marinade, then grilled or broiled and glazed with a kicked up lite Ranch dressing, finished with a sprinkling of Gorgonzola cheese.
This is the recipe I started making buffalo chicken with.
12 chicken tenders, about 12 ounces
1/2 cup Louisiana hot sauce
1/2 cup all-purpose flour
1 teaspoon kosher salt
1 tablespoon Cajun seasoning
1 tablespoon butter
2 tablespoons vegetable oil
Soak the chicken in the hot sauce in the refrigerator for at least 30 minutes. Put the flour in a pie tin and season with salt and Cajun seasoning. Remove chicken from hot sauce, shake off excess, and dredge chicken in the flour. Set on a baking rack.
Heat the butter and oil in a large skillet over medium heat. When the butter has stopped bubbling, add the chicken tenders and cook until golden and cooked through, about 3 minutes per side. Remove from the pan and drain on paper towels. Serve warm with blue cheese dipping sauce and celery pieces.
I always had a hard time getting the coating to stay on without egg, so I got rid of the coating all together. Now, be careful, we used to just slap it in a frying pan and it was like someone sprayed pepper spray in the house (cooking is about trial and error, that was all error!) I now use my tabletop grill, which, if you don't have one, I highly suggest that you get one. They're fantastic, especially now that we live in Arizona and the last thing we need is something making us warmer!
So basically, my way of cooking it is marinade the chicken in your favorite hot sauce for about an hour (the longer you leave it in, the hotter it gets. Once I left it in for a day, it was almost too hot to eat!) Then I grill it. Healthy, delicious, inexpensive, and quick!
Buffalo Chicken Stuffed French Bread
With football season upon us, I thought this would be a fitting choice of a recipe to find :)
BUFFALO CHICKEN STUFFED FRENCH BREAD
A pub favorite! We've combined flavors of Buffalo Chicken, bacon and Gorgonzola cheese. Stuffed into a crunchy French bread, the flavors melt together to make a tantalizing new baked sandwich! Sliced and served at your next halftime or tailgate party.
I found the recipe very quickly here.
4 boneless chicken breasts
1 cup ranch dressing
1 cup chili sauce
1 cup shredded cheddar cheese
1 loaf French bread
cayenne pepper
Change Measurements: US | Metric
Directions:
Prep Time: 20 mins
Total Time: 35 mins
Cook the chicken breasts (I like to boil them) and then shred with two forks.
Mix cheese, ranch dressing, and chili sauce with the chicken.
Slice the french bread loaf lengthwise. Do not separate the two halves -- just butterfly it. Scoop out the soft bread filling, and break into little bits with your fingers.
Add the bread pieces in with the chicken mix, and stir well to get everything coated nicely.
Spoon all the chicken filling back into the french bread shells. Close the loaf together, and wrap tightly in foil.
Bake at 350 degrees for about 15 minutes to melt the cheese.
When cool enough to handle, slice into rounds about 1 or 2 inches thick.
I'm definitely going to be trying this very soon! My husband loves buffalo chicken, especially mine because it's lower in fat than most places (and cheaper!) so I'm sure this is something he'll love.
Maple glazed roast pork
Here's my next choice of recipe to help others find.
MAPLE GLAZED PORK ROAST
Taste October! Our lean pork loin is roasted and glazed with a delicate blend of maple-flavored syrup, herbs, Dijon mustard and a touch of cider vinegar creating a sweet, yet savory, roast. Cooked until tender and succulent, the aromas fill the house after you pop in the oven and relax.
I found the recipe very quickly on allrecipes.com here
Ingredients
2 1/2 pounds boneless pork loin roast
1 cup real maple syrup
4 tablespoons prepared Dijon-style mustard
2 1/2 tablespoons cider vinegar
2 1/2 tablespoons soy sauce
salt to taste
ground black pepper to taste
Directions
Preheat the oven to 350 degrees F (175 degrees C).
Stir together the maple syrup, mustard vinegar, soy sauce, salt, and pepper in a small bowl. Place pork roast in a shallow roasting pan. Spread glaze evenly over pork roast.
Roast pork in the preheated oven uncovered, until internal temperature measured with a meat thermometer reaches 160 degrees F (70 degrees C), about 1 hour. Remove from oven, and let rest about 10 minutes before slicing to serve.
I will eventually try this, I'm very curious about the taste of it. If anyone tries it, let me know how it turns out!
Tested the recipe
So, I tested the first recipe, it came out pretty good! You didn't really need the butter, but like everything butter touches, it just made it better! We followed the recipe and let it marinade for 4 hours. Here it is on my tabletop grill:

I used breasts that weren't split, I really loved how that one looked like a heart. Grilled chicken is love, hee hee!
This is a pic of the finished grilled chicken:

Yeah, sure, you can eat that with some rice, and vegetables, call it a meal, but I decided to get a little different with it. Using one of the breasts (so half of that heart), I was going to make a salad with a friend. I wanted to grill the romaine (don't gasp with shock, I saw it on the food network and thought, well that could be good!) but she had a new lettuce knife that she was dying to try and got a little overzealous with it. Whatevs, I wasn't dying to try a totally grilled salad! I grilled 2 tomatoes that I cut in half, and an ear of corn. I cut the niblets off the corn and diced the grilled tomatoes, adding them to the romaine lettuce. I cut up the chicken breast and added a Sargento's salad finisher (this one was dried cranberries, pecans, and mozzarella asiago blend), and that was that. You heard me, NO DRESSING. It didn't need it. All the flavors blended and the textures were so great, it didn't need to be covered with anything. My friend agreed. Here's a pic of the salad:

The second way that I made this chicken was cut up and tossed with a stir fried bok choy. I mentioned in a previous post that I made "chicken" and broccoli stir fry. Well, the week that I made this chicken, I also made hot and sour soup. I bought too much bok choy, and had to figure out what to do with it! I enjoyed the glaze on the vegetables in the previous recipe, and since it was just me eating it, I went crazy. I followed the recipe and put the red pepper flakes in it. Umm, yeah, NOT DOING THAT AGAIN! It was super hot. I think I doubled the recipe but still used 1/4 tsp red pepper and it hurt the next day, I'll just put it that way. Here's the recipe again:
2 Tbsp. soy sauce
1 Tbsp. cornstarch
1 Tbsp. distilled white vinegar
1 Tbsp. minced fresh ginger
1 tsp. minced garlic
1/4 tsp. red pepper flakes
1 head bok choy
In a small bowl, combine the soy sauce, cornstarch, vinegar, ginger, garlic, and red pepper flakes. Whisk until combined.
Cut the bok choy into 1/4-inch-thick pieces.
Heat a wok or large skillet over high heat. Add the oil. When almost smoking, add the vegetables, stir-frying for 1 minute. Add the broth and cook, scraping the bottom, until the vegetables are tender.
It was quick, and tasty, working with the sesame, ginger, and soy from the chicken as well. I don't think that I'll be using fresh ginger in this recipe again though, I don't like to bite into fresh ginger, so it'll be ground ginger from here on out!
So there's two other ways to serve this tasty chicken. I used half a breast with the bok choy and that was the perfect lunch size, so we were able to have 8 lunches out of the 4 breasts I marinaded with this. I think that's pretty awesome for those on a budget (we're stressing portion size here, 4 oz of chicken is roughly half a breast.)
I used breasts that weren't split, I really loved how that one looked like a heart. Grilled chicken is love, hee hee!
This is a pic of the finished grilled chicken:
Yeah, sure, you can eat that with some rice, and vegetables, call it a meal, but I decided to get a little different with it. Using one of the breasts (so half of that heart), I was going to make a salad with a friend. I wanted to grill the romaine (don't gasp with shock, I saw it on the food network and thought, well that could be good!) but she had a new lettuce knife that she was dying to try and got a little overzealous with it. Whatevs, I wasn't dying to try a totally grilled salad! I grilled 2 tomatoes that I cut in half, and an ear of corn. I cut the niblets off the corn and diced the grilled tomatoes, adding them to the romaine lettuce. I cut up the chicken breast and added a Sargento's salad finisher (this one was dried cranberries, pecans, and mozzarella asiago blend), and that was that. You heard me, NO DRESSING. It didn't need it. All the flavors blended and the textures were so great, it didn't need to be covered with anything. My friend agreed. Here's a pic of the salad:
The second way that I made this chicken was cut up and tossed with a stir fried bok choy. I mentioned in a previous post that I made "chicken" and broccoli stir fry. Well, the week that I made this chicken, I also made hot and sour soup. I bought too much bok choy, and had to figure out what to do with it! I enjoyed the glaze on the vegetables in the previous recipe, and since it was just me eating it, I went crazy. I followed the recipe and put the red pepper flakes in it. Umm, yeah, NOT DOING THAT AGAIN! It was super hot. I think I doubled the recipe but still used 1/4 tsp red pepper and it hurt the next day, I'll just put it that way. Here's the recipe again:
2 Tbsp. soy sauce
1 Tbsp. cornstarch
1 Tbsp. distilled white vinegar
1 Tbsp. minced fresh ginger
1 tsp. minced garlic
1/4 tsp. red pepper flakes
1 head bok choy
In a small bowl, combine the soy sauce, cornstarch, vinegar, ginger, garlic, and red pepper flakes. Whisk until combined.
Cut the bok choy into 1/4-inch-thick pieces.
Heat a wok or large skillet over high heat. Add the oil. When almost smoking, add the vegetables, stir-frying for 1 minute. Add the broth and cook, scraping the bottom, until the vegetables are tender.
It was quick, and tasty, working with the sesame, ginger, and soy from the chicken as well. I don't think that I'll be using fresh ginger in this recipe again though, I don't like to bite into fresh ginger, so it'll be ground ginger from here on out!
So there's two other ways to serve this tasty chicken. I used half a breast with the bok choy and that was the perfect lunch size, so we were able to have 8 lunches out of the 4 breasts I marinaded with this. I think that's pretty awesome for those on a budget (we're stressing portion size here, 4 oz of chicken is roughly half a breast.)
Thursday, September 23, 2010
First recipe!
SAVORY GRILLED CHICKEN WITH SESAME HONEY BUTTER
Back by popular demand! Our sesame honey butter tops our all natural chicken breasts marinated in a scrumptious blend of sweet sesame, ginger and garlic for a punch of flavor. This moist golden brown chicken is ready in just 15 minutes and is bursting with flavor.
So, when you get through the fancy terms you see sesame honey butter on top of chicken breast that was marinaded in a sesame, ginger and garlic sauce. Pshaw, easy!
Here is a recipe for the chicken.
4 boneless & skinless chicken breasts
3 garlic cloves peeled & crushed
1/2 cup soy sauce
1/4 cup seasoned rice wine vinegar
2 tablespoons honey
1 Tbsp fresh ginger root, peeled and grated
4 medium green onions, chopped
2 tablespoons toasted sesame oil
4-6 sprigs fresh cilantro, rinsed and dried
1 tsp toasted sesame seeds (optional)
Combine the soy sauce, garlic, vinegar, honey, ginger, onions, sesame oil and optional sesame seeds to make a marinade. Pour the marinade into a large plastic zipper baggie. Add the chicken breasts to the baggie, squeeze out the excess air and seal. Transfer the baggie to the refrigerator and allow the chicken to marinate for 3 to 4 hours.
Prepare a grill or grill pan by spraying with a bit of canola cooking spray, then get it very hot. Pick the cilantro leaves off the stems and set aside. Remove chicken from the marinade. Broil or grill 3 to 4 minutes per side, until it is tender and fully cooked. Garnish with cilantro leaves and serve.
Here is the recipe for the butter.
1 cup (2 sticks) salted butter, at room temperature
2 tablespoons honey
1 teaspoon toasted sesame oil*
3 teaspoons lightly toasted sesame seeds† (or a mix of black and white sesame seeds)
*Use toasted sesame oil and sesame seeds to bump up the sesame flavor.
†To toast sesame seeds, place seeds in a single layer on an ungreased, shallow pan. Bake at 350°F for 5 to 10 minutes or until golden brown. Remove from pan to cool.
Preparation
Place the butter in a medium mixing bowl and, with an electric mixer (fitted with the paddle) or wooden spoon, beat until light and fluffy. Scrape down the sides.
Add the honey, sesame oil and sesame seeds and beat to incorporate, scraping down the sides. Taste for salt.
Scrape into a small bowl, serving crock or butter molds and cover tightly; or shape into a long roll in grease-proof paper (plastic, wax or parchment) for storing and slicing as needed.
Ok, don't let the times listed on the sites freak you out. If you're planning your menu for the week and doing prep ahead of time, you can prepare the marinade and put it in a baggie with the chicken ahead of time. It can hang out in the marinade in the freezer and then when it's thawing. The butter is super easy to make, but if you're going for a lighter dish, you can easily leave it off. I'm going to be trying this in the next few days to test out the recipes.
A thought on where to take the blog
A friend of mine had told me that this local business that supplies food for dinner was a great value. I trusted her opinion and we placed an order for carne asada and something they called "Pacific Rim chicken". We paid $40 for it and when I saw how much we got, I was upset. It was barely enough for dinner and a lunch leftover in both bags. The beef was sliced, making it hard to grill (even though that was the method of cooking they recommended), they were really heavy handed with the cilantro and the tortillas they provided were awful. The fact that the beef was sliced in the manner it was told me that the beef they used was a cheaper cut of meat, so they cut it for their customers to make sure no one cut it wrong (because cutting skirt steak, flank steak, and cuts of that nature the wrong way makes it really chewy.) It was $20 for just marinaded meat and bad tortillas. I was peeved to say the least.
I gave them one last chance with the Pacific Rim chicken. Pacific Rim chicken is not good! It tasted like teriyaki chicken, which to be quite honest is a breeze to make simply (Kikkoman teriyaki, the runny kind, in a baggie with chicken for 30 minutes, then cook, all done!) The sugar content in the marinade was through the roof, and to cook the chicken until it was done (ie, so it was safe for consumption!) it burned the crap out of a nonstick skillet I had. Notice, I said HAD! After a week of soaking, scrubbing, and bitching, I finally threw it away.
Needless to say, I'm not going back to this place. I can get marinaded meat anywhere around town for a fraction of the cost of what I paid at this place. A lot of places offer free marinades for meat you buy, and it's really not that hard to whip up a marinade. Maybe it was my fault for picking 2 things that were seriously simple to make, but if you can't do simple properly, then you have issues.
I've looked at the different menus of businesses that are of the same model (come pick up premade freezer meals and/or make them yourself) and I have to say that a lot of the dishes are super simple to make, or would take a few minutes on google to find a good recipe that would work for you. I've made copies of these menus for myself (not naming any names!) and I'm going to share recipes on how to make them yourself. Save yourself some money! Get comfortable in the kitchen!
Red snapper baked Alaska style and Vichy carrots

Here is the recipe for the snapper.
2 tablespoons butter
2 pounds red snapper fillets
salt and white pepper to taste
2 egg whites
2 tablespoons chopped fresh parsley
Dijon mustard
1 teaspoon dried tarragon
3 tablespoons fresh bread crumbs
Preheat the oven to 375 degrees F (190 degrees C). Spread butter into the bottom of a 9x13 inch baking dish. Arrange fish fillets in a single layer over the bottom of the pan, and sprinkle with salt and pepper.
Bake for about 12 minutes in the preheated oven. Meanwhile, whip egg whites in a clean dry bowl until stiff peaks form. Fold in the parsley, mustard and tarragon. Spread the egg white mixture over the fish in a layer about 1 inch thick. Sprinkle bread crumbs over the top.
Return to the oven, and bake for about 6 more minutes, or until meringue is golden, and fish flakes with a fork.
Here is the recipe for the carrots.
2 pounds carrots
4 tablespoons butter
Kosher salt
1 to 2 teaspoons sugar
Handful chopped fresh parsley sprigs
Slice the carrots into coins. Put them in a saute pan with the butter, salt, sugar, and 1 cup water. Cook, tossing occasionally, until the carrots are tender and the liquid has reduced to a glaze. Scatter over the parsley, and serve.
Ok, where do I begin in this review? Well, the carrots, basically, waste of butter. Seriously. The recipe just wasn't good and it left a residue on my plate that was unappealing. The fish was interesting, but Kevin hated the meringue on top. The girls were stealing it, so it might be a fun way to make eggs for the girls in the future, but I won't be trotting out this dish again.
Wednesday, September 22, 2010
Update time!
I didn't get a picture on Sunday but I'm down almost 3 lbs, so yay! I've been going to the gym and working out on the elliptical every day this week for an hour, except for today. I was just feeling blah and didn't want to do much of anything. Oddly enough, last week I felt the same way on Thursday. Hopefully next Thursday I won't be feeling blah too.
Last night I made a very tasty spiced shrimp recipe which was so simple! The recipe also had a papaya salsa that went with it, but Emily is the only one in our family that likes papaya, and she wouldn't be eating spicy shrimp anyway, so it seemed like a waste of money to make that part of the recipe. I got the recipe from an old Weight Watchers recipe book, but I figured even if things had changed, it's still a good recipe because it's shrimp and spices, nothing else (except some Pam.)
Here's the recipe:
1 1/2 tsp paprika
1/2 tsp dried thyme (I used ground because that's what I have)
1/2 tsp salt
1/2 tsp black pepper
1/8-1/4 tsp cayenne (I used 1/4 tsp chipotle peppers and it was spicy!)
1 1/4 lbs large shrimp, peeled (tails left on) and deveined (I took the tails off)
(I left this out, but I'm including it in case it sounds tasty to you!)
2 cubes cubed papaya
3 scallions, thinly sliced
1 lime, peeled and diced
Spray a grill basket or the broiler rack with canola oil nonstick spray; prepare the grill or preheat the broiler. Combine the paprika, thyme, salt, pepper, and cayenne in a zip-close plastic bag; add the shrimp. Squeeze out the air and seal the bag; shake to coat the shrimp.
Meanwhile, combine the papaya, scallions, and lime in a small bowl; set aside.
Grill the shrimp in the basket or broil the shrimp 6 inches from the heat until just opaque in the center, about 3 minutes on each side. Serve with salsa on the side.
I didn't use my broiler, I just did it in a frying pan. I was using cooked shrimp, so 2 minutes in the skillet was enough. I served it with rice, peas, and a salad. The shrimp was a 2 pound bag, so I split it and made some with garlic salt for the girls, they are very anti spicy!

Best of all, there's leftovers!
Last night I made a very tasty spiced shrimp recipe which was so simple! The recipe also had a papaya salsa that went with it, but Emily is the only one in our family that likes papaya, and she wouldn't be eating spicy shrimp anyway, so it seemed like a waste of money to make that part of the recipe. I got the recipe from an old Weight Watchers recipe book, but I figured even if things had changed, it's still a good recipe because it's shrimp and spices, nothing else (except some Pam.)
Here's the recipe:
1 1/2 tsp paprika
1/2 tsp dried thyme (I used ground because that's what I have)
1/2 tsp salt
1/2 tsp black pepper
1/8-1/4 tsp cayenne (I used 1/4 tsp chipotle peppers and it was spicy!)
1 1/4 lbs large shrimp, peeled (tails left on) and deveined (I took the tails off)
(I left this out, but I'm including it in case it sounds tasty to you!)
2 cubes cubed papaya
3 scallions, thinly sliced
1 lime, peeled and diced
Spray a grill basket or the broiler rack with canola oil nonstick spray; prepare the grill or preheat the broiler. Combine the paprika, thyme, salt, pepper, and cayenne in a zip-close plastic bag; add the shrimp. Squeeze out the air and seal the bag; shake to coat the shrimp.
Meanwhile, combine the papaya, scallions, and lime in a small bowl; set aside.
Grill the shrimp in the basket or broil the shrimp 6 inches from the heat until just opaque in the center, about 3 minutes on each side. Serve with salsa on the side.
I didn't use my broiler, I just did it in a frying pan. I was using cooked shrimp, so 2 minutes in the skillet was enough. I served it with rice, peas, and a salad. The shrimp was a 2 pound bag, so I split it and made some with garlic salt for the girls, they are very anti spicy!
Best of all, there's leftovers!
Monday, September 13, 2010
Amazing tip I just got from Daisy Cooks!
When making things with clams, put them in salt water with some corn meal in it. She said that the clams will eat the corn meal and spit out the sand, so you don't have sand in your dish. This is a pet peeve of mine, so I'm definitely going to try this in the future!
Moroccan chicken
I love trying new dishes (obviously!) and this one seemed like a nice stewed chicken dish with lots of sauce to put over tasty couscous. If you haven't tried couscous yet, it's super simple to make. You can buy it by the ounce at Sprouts for very cheap, and it's quick to make. You use 1 part couscous and 2 parts of water/stock/broth. You bring boil the liquid, add the couscous, make sure it's all in the liquid, turn off the heat, put the cover on, and leave it alone for 5 minutes. You can then fluff it with a fork and it's good to go. It's great for a quick snack or a side dish when you realize that you forgot to make something (or the kids are still hungry!) It's one of the best grain dishes to use, containing protein and more vitamins than pasta and rice.
Here is the recipe.
4 chicken leg quarters, skinned
1 tablespoon olive oil
1 medium onion, cut into chunks
4 garlic cloves, minced
1 tablespoon fresh ginger, minced
2 medium carrots, cut into chunks
1 cup canned chick-peas, drained
1/2 cup golden raisin
2 cinnamon sticks
1 1/2 teaspoons cumin
1/2 teaspoon turmeric
5 cups water
2 medium zucchini, cut into chunks
1/2 teaspoon salt
1/4 teaspoon pepper
2 cups couscous
In a large saucepan or Dutch oven, place olive oil over high heat. Add chicken and cook about 10 minutes, turning to brown on all sides.
Stir in onion, garlic, ginger, carrots, chickpeas, raisins, cinnamon, cumin, turmeric, and water. Bring to a simmer, reduce heat to low and cook about 20 minutes.
Meanwhile make couscous according to directions on package and divide among 4 serving bowls and set aside.
Stir in zucchini to the chicken in the pot, and cook about 10 minutes more. Remove cinnamon sticks and add salt and pepper. Serve chicken over the couscous with sauce spooned over.
I made some changes to this dish. I knew my husband wouldn't eat it if it had raisins in it, so those weren't added. The chicken leg quarters didn't thaw in time, so we ran to the store and got some chicken thighs to use instead (because we couldn't find chicken leg quarters.) I pretty much did the rest of the recipe as it's written, using my vegetable bouillon to make the couscous (seriously, make the bouillon, there are so many applications for it, and it's nice to have in the freezer when you need stock or broth and realize you have none!)
Here is a picture of it:

The changes that I would make in the future would be to leave the zucchini and chickpeas out (per the hubby's request), and use boneless skinless chicken breast, so that we don't have to worry about skin sticking to my pan! Other than that, it's a tasty dish. My 5 year old loved it, and my 2 year old ate it without complaining, so win for me!
Here is the recipe.
4 chicken leg quarters, skinned
1 tablespoon olive oil
1 medium onion, cut into chunks
4 garlic cloves, minced
1 tablespoon fresh ginger, minced
2 medium carrots, cut into chunks
1 cup canned chick-peas, drained
1/2 cup golden raisin
2 cinnamon sticks
1 1/2 teaspoons cumin
1/2 teaspoon turmeric
5 cups water
2 medium zucchini, cut into chunks
1/2 teaspoon salt
1/4 teaspoon pepper
2 cups couscous
In a large saucepan or Dutch oven, place olive oil over high heat. Add chicken and cook about 10 minutes, turning to brown on all sides.
Stir in onion, garlic, ginger, carrots, chickpeas, raisins, cinnamon, cumin, turmeric, and water. Bring to a simmer, reduce heat to low and cook about 20 minutes.
Meanwhile make couscous according to directions on package and divide among 4 serving bowls and set aside.
Stir in zucchini to the chicken in the pot, and cook about 10 minutes more. Remove cinnamon sticks and add salt and pepper. Serve chicken over the couscous with sauce spooned over.
I made some changes to this dish. I knew my husband wouldn't eat it if it had raisins in it, so those weren't added. The chicken leg quarters didn't thaw in time, so we ran to the store and got some chicken thighs to use instead (because we couldn't find chicken leg quarters.) I pretty much did the rest of the recipe as it's written, using my vegetable bouillon to make the couscous (seriously, make the bouillon, there are so many applications for it, and it's nice to have in the freezer when you need stock or broth and realize you have none!)
Here is a picture of it:
The changes that I would make in the future would be to leave the zucchini and chickpeas out (per the hubby's request), and use boneless skinless chicken breast, so that we don't have to worry about skin sticking to my pan! Other than that, it's a tasty dish. My 5 year old loved it, and my 2 year old ate it without complaining, so win for me!
Tasty steak marinade
At the beginning of September I went to a bunch of the stores having meat sales and stocked up. I think I spent about $150 and got a month's worth of meat hanging out in my chest freezer (which is full, yay!) I was looking for different ways to make the meat, even though the hubby would love it if we just grilled it with some spices and served it with rice and a vegetable. I'm not down with that! I found this recipe and I used it on a ribeye (because Kevin didn't want to dig around to get the sirloin!) He was worried he wouldn't like the steak, so he took out 2 and asked me to only marinade one. Sure, no problem, but you're seasoning the other steak. I followed this recipe for the marinade and it was super tasty.
1/4 cup honey
3 tablespoons reduced-sodium soy sauce
2 tablespoons olive oil
1 tablespoon balsamic vinegar
2 garlic cloves, peeled
1/4 teaspoon coarsely ground pepper
2 (5 ounce) boneless beef sirloin steaks
3 green onions, sliced
In a blender, combine the honey, soy sauce, oil, vinegar, garlic and pepper; cover and process until blended. Pour 1/3 cup marinade into a large resealable plastic bag; add steaks and onions. Seal bag and turn to coat; refrigerate for at least 1-2 hours. Cover and refrigerate remaining marinade for basting.
Coat grill rack with nonstick cooking spray before starting the grill. Drain and discard marinade. Grill steaks until they're done to your liking.
I used my indoor grill for this, and it doesn't have a cover, so I couldn't follow the recipe exactly, and I didn't baste it, but that wasn't an issue because it was juicy and flavorful!
Here's a picture of the steaks. Top is not marinaded, bottom is.

The best part is that Kevin liked the marinade! The simple seasoned and grilled steak was forgotten, poor thing. He ate it for lunch later in the week (as did we, we're really trying to focus on our portion sizes, so most of the time a single steak will be a meal for the 4 of us.) The marinade really helped get those lovely grill marks that people look for, more so than the simple seasoned one.
1/4 cup honey
3 tablespoons reduced-sodium soy sauce
2 tablespoons olive oil
1 tablespoon balsamic vinegar
2 garlic cloves, peeled
1/4 teaspoon coarsely ground pepper
2 (5 ounce) boneless beef sirloin steaks
3 green onions, sliced
In a blender, combine the honey, soy sauce, oil, vinegar, garlic and pepper; cover and process until blended. Pour 1/3 cup marinade into a large resealable plastic bag; add steaks and onions. Seal bag and turn to coat; refrigerate for at least 1-2 hours. Cover and refrigerate remaining marinade for basting.
Coat grill rack with nonstick cooking spray before starting the grill. Drain and discard marinade. Grill steaks until they're done to your liking.
I used my indoor grill for this, and it doesn't have a cover, so I couldn't follow the recipe exactly, and I didn't baste it, but that wasn't an issue because it was juicy and flavorful!
Here's a picture of the steaks. Top is not marinaded, bottom is.
The best part is that Kevin liked the marinade! The simple seasoned and grilled steak was forgotten, poor thing. He ate it for lunch later in the week (as did we, we're really trying to focus on our portion sizes, so most of the time a single steak will be a meal for the 4 of us.) The marinade really helped get those lovely grill marks that people look for, more so than the simple seasoned one.
Tomato Curry Lentil Stew
Every week I try to make a soup. It's a nice quick lunch when we're busy, it's something Kevin can take to work if we don't have leftovers from the night before, and they're filling and generally inexpensive. I actually made this recipe when I made the masoor dal, in case it wasn't filling enough. No one else ate it but me that night, and in the days since I can say that this is definitely a make ahead dish. It has gotten MUCH better while hanging out in my fridge!
Here is the recipe.
1-1/2 cups dry lentils
3 cups water
15 ounces stewed tomatoes
1/4 cup and 2 tablespoons chopped onion
6 stalks celery, chopped, with leaves
3/4 teaspoon curry powder
9 cloves garlic, minced
salt to taste
ground black pepper to taste
Combine lentils and water, bring to a boil.
Lower heat to simmer, add tomatoes, onion, and celery. Cover and let simmer 45 minutes. Check every 15 minutes to stir, and add water if necessary. Add spices last 15 minutes to taste. Taste and re-spice if necessary before serving.
I like allrecipes.com because they have the option of changing the number of servings and they give you an altered recipe. It really takes the guess work out of it, which is fantastic. I made this recipe with 6 servings, so that I could buy a 15 oz can of stewed tomatoes (I hate recipes that only call for 1-2 tablespoons of tomato paste when the smallest can you can buy is 4 or 6 ounces!) Anyway, I probably wouldn't use stewed tomatoes again, they're basically whole tomatoes that have been stewed, so you have some really big unwieldy blobs of tomato hanging out in your soup. I'm not a fan of needing to cut your soup (unless it's matzo ball soup!) so I'd probably substitute a can of diced tomatoes. I added about a cup of water at the 15 and 30 minute mark as well.

This is a tasty soup, and with the few changes I've mentioned, I think it's a real winner for a make ahead soup. The recipe was really cheap to make, and for those on WIC, this is a great way to use the dried beans you get (and the beauty of lentils are that they don't need to be soaked overnight!)
Here is the recipe.
1-1/2 cups dry lentils
3 cups water
15 ounces stewed tomatoes
1/4 cup and 2 tablespoons chopped onion
6 stalks celery, chopped, with leaves
3/4 teaspoon curry powder
9 cloves garlic, minced
salt to taste
ground black pepper to taste
Combine lentils and water, bring to a boil.
Lower heat to simmer, add tomatoes, onion, and celery. Cover and let simmer 45 minutes. Check every 15 minutes to stir, and add water if necessary. Add spices last 15 minutes to taste. Taste and re-spice if necessary before serving.
I like allrecipes.com because they have the option of changing the number of servings and they give you an altered recipe. It really takes the guess work out of it, which is fantastic. I made this recipe with 6 servings, so that I could buy a 15 oz can of stewed tomatoes (I hate recipes that only call for 1-2 tablespoons of tomato paste when the smallest can you can buy is 4 or 6 ounces!) Anyway, I probably wouldn't use stewed tomatoes again, they're basically whole tomatoes that have been stewed, so you have some really big unwieldy blobs of tomato hanging out in your soup. I'm not a fan of needing to cut your soup (unless it's matzo ball soup!) so I'd probably substitute a can of diced tomatoes. I added about a cup of water at the 15 and 30 minute mark as well.
This is a tasty soup, and with the few changes I've mentioned, I think it's a real winner for a make ahead soup. The recipe was really cheap to make, and for those on WIC, this is a great way to use the dried beans you get (and the beauty of lentils are that they don't need to be soaked overnight!)
Masoor Dal
A friend of mine was telling me that incorporating a vegetarian meal at least once a week into her menu has helped cut her grocery costs. I think that's awesome, and I'd heard of "Meatless Monday" in the past. I love Indian food, and it's hard to get the family on board when we're looking for somewhere to go out to eat (they NEVER want to go!) so I decided to take matters into my own hands and make some at home. My husband likes lentil soup, so I figured this would be a fantastic recipe to try because there's nothing in it that he doesn't like (except for ginger, but tumeric is a heavy spice, so I figured it would blend in.)
I went to Sprouts and got the tumeric and cumin seeds by the ounce. I think it cost me like 30 cents for the spices, and I had much more than I needed.
Here is the recipe.
1 cup red lentils
1 slice ginger, 1 inch piece, peeled
1/4 teaspoon ground turmeric
1 teaspoon salt
1/2 teaspoon cayenne pepper, or to taste
4 teaspoons vegetable oil
4 teaspoons dried minced onion
1 teaspoon cumin seeds
Rinse lentils thoroughly and place in a medium saucepan along with ginger, turmeric, salt and cayenne pepper. Cover with about 1 inch of water and bring to a boil. Skim off any foam that forms on top of the lentils. Reduce heat and simmer, stirring occasionally, until beans are tender and soupy.
Meanwhile, in a microwave safe dish combine oil, dried onion and cumin seeds. Microwave on high for 45 seconds to 1 minute; be sure to brown, but not burn, onions. Stir into lentil mixture.
Again, I did a variation on the recipe. Looking at the reviews, someone said it's better to use fresh onion (I wasn't about to buy dried onion just for this, even though I could get it by the ounce) and I'd NEVER heard of anything browning properly in the microwave, so I browned the onion and garlic in the oil on the stove while the lentils were doing their thing. The recipe had great flavor and only my 2 year old refused to eat it (she just wanted to eat rice.) My 5 year old LOVED it, and my husband liked it, so I call it a win. The lentils can be bought by the ounce as well, and I think it was only $2 for the lentils I needed for the recipe (note, the recipe yields only 4 small servings, but can be altered on the page, they do all the work for you, yay! I highly recommend making more, it was very tasty.)

Obviously I served it over rice. It doesn't look like much, but it packs a lot of flavor. The great thing about lentils is that they're one of the highest vegetarian forms of iron, and when paired with rice, they make a complete protein dish. In short, this dish is tasty, easy on the wallet, AND good for you!
I went to Sprouts and got the tumeric and cumin seeds by the ounce. I think it cost me like 30 cents for the spices, and I had much more than I needed.
Here is the recipe.
1 cup red lentils
1 slice ginger, 1 inch piece, peeled
1/4 teaspoon ground turmeric
1 teaspoon salt
1/2 teaspoon cayenne pepper, or to taste
4 teaspoons vegetable oil
4 teaspoons dried minced onion
1 teaspoon cumin seeds
Rinse lentils thoroughly and place in a medium saucepan along with ginger, turmeric, salt and cayenne pepper. Cover with about 1 inch of water and bring to a boil. Skim off any foam that forms on top of the lentils. Reduce heat and simmer, stirring occasionally, until beans are tender and soupy.
Meanwhile, in a microwave safe dish combine oil, dried onion and cumin seeds. Microwave on high for 45 seconds to 1 minute; be sure to brown, but not burn, onions. Stir into lentil mixture.
Again, I did a variation on the recipe. Looking at the reviews, someone said it's better to use fresh onion (I wasn't about to buy dried onion just for this, even though I could get it by the ounce) and I'd NEVER heard of anything browning properly in the microwave, so I browned the onion and garlic in the oil on the stove while the lentils were doing their thing. The recipe had great flavor and only my 2 year old refused to eat it (she just wanted to eat rice.) My 5 year old LOVED it, and my husband liked it, so I call it a win. The lentils can be bought by the ounce as well, and I think it was only $2 for the lentils I needed for the recipe (note, the recipe yields only 4 small servings, but can be altered on the page, they do all the work for you, yay! I highly recommend making more, it was very tasty.)
Obviously I served it over rice. It doesn't look like much, but it packs a lot of flavor. The great thing about lentils is that they're one of the highest vegetarian forms of iron, and when paired with rice, they make a complete protein dish. In short, this dish is tasty, easy on the wallet, AND good for you!
Jalapeno poppers!
I found this recipe for yellow peppers stuffed with quinoa, corn, and feta cheese and wanted to try it. While grocery shopping at Fresh & Easy, I saw they only had a big bag of jalapenos as opposed to selling them by the piece. I grabbed the bag and some neufchatel cheese, and figured I'd make baked jalapeno poppers. We had some that were lackluster from Buffalo Wings and Rings the night before, and I figured I couldn't do much worse! My husband talks about these poppers that the wife of a coworker from a previous unit (5+ years ago!) made, and I was a little jealous to be honest. If he's going to be talking about someone's poppers, I want them to be mine, dang it! I tried 2 different recipes, one mixing cheddar cheese, cream cheese, garlic, and paprika, and the other just straight cream cheese. Both are wrapped in delicious bacon, I highly recommend getting nitrate free bacon, this way you can feel super good about your choice to nosh on deliciousness.
Recipe #1
5 large jalapenos (or more if they're smaller)
1/2 c cream cheese
1 c shredded cheddar
1 t salt
pinch of pepper
3/4 t smoked paprika
1 clove garlic, crushed
5 slices bacon
So, I don't think I ever really follow recipes exactly. Between a picky husband and kids, and my love of garlic, I'm always making changes. In this one, I used neufchatel cheese in place of cream cheese (in a fruitless attempt to make them better for me, heh!) and used about 5 cloves of garlic. Don't worry, it's not too much! Basically, this puppy is easy, I cut the tops off the jalapenos, slit it down the middle, and scraped out the membranes and seeds. I mixed the cream cheese, shredded cheese, salt, pepper, paprika, and garlic all together, then stuffed those bad boys. I would recommend you not stuff them too much, a lot of it ended up on my baking sheet, which really sucked, even though I tried hard not to stuff them too much. You wrap them in bacon, and keep it in place with a toothpick.

I took this picture while Kevin was taking them off the roaster (so the bacon fat would have somewhere to go!) I followed the recipe's guidelines, and it wasn't enough time. It was all pale and not so tasty, the bacon was stretchy and blech. We popped them back in the oven for another 10 minutes at 375, I would say a MINIMUM of 30 minutes in the oven.
Recipe #2
Now, this recipe is super simple. Cut the jalapenos in half, scoop out it's guts, fill with cream cheese and wrap with 1/3 of a strip of bacon then secure with a toothpick. Again, we followed the directions on the recipe for cooking time, and they came out much better.

Excuse the messy plate, but as you can see the bacon is much crisper looking. This was tasty, but we were missing the flavor of the first one.
Side by side pic

Verdict?
I would follow recipe # 1, but use a longer cooking time, and add way more than the 4 garlic cloves that I added (but then again, I love garlic!) If you're doing it for a game day situation, I'd do the recipe #2 situation (1/2 a pepper wrapped in 1/3 slice of bacon) to help stretch ingredients, but still use the filling recipe from recipe #1.
Recipe #1
5 large jalapenos (or more if they're smaller)
1/2 c cream cheese
1 c shredded cheddar
1 t salt
pinch of pepper
3/4 t smoked paprika
1 clove garlic, crushed
5 slices bacon
So, I don't think I ever really follow recipes exactly. Between a picky husband and kids, and my love of garlic, I'm always making changes. In this one, I used neufchatel cheese in place of cream cheese (in a fruitless attempt to make them better for me, heh!) and used about 5 cloves of garlic. Don't worry, it's not too much! Basically, this puppy is easy, I cut the tops off the jalapenos, slit it down the middle, and scraped out the membranes and seeds. I mixed the cream cheese, shredded cheese, salt, pepper, paprika, and garlic all together, then stuffed those bad boys. I would recommend you not stuff them too much, a lot of it ended up on my baking sheet, which really sucked, even though I tried hard not to stuff them too much. You wrap them in bacon, and keep it in place with a toothpick.
I took this picture while Kevin was taking them off the roaster (so the bacon fat would have somewhere to go!) I followed the recipe's guidelines, and it wasn't enough time. It was all pale and not so tasty, the bacon was stretchy and blech. We popped them back in the oven for another 10 minutes at 375, I would say a MINIMUM of 30 minutes in the oven.
Recipe #2
Now, this recipe is super simple. Cut the jalapenos in half, scoop out it's guts, fill with cream cheese and wrap with 1/3 of a strip of bacon then secure with a toothpick. Again, we followed the directions on the recipe for cooking time, and they came out much better.
Excuse the messy plate, but as you can see the bacon is much crisper looking. This was tasty, but we were missing the flavor of the first one.
Side by side pic
Verdict?
I would follow recipe # 1, but use a longer cooking time, and add way more than the 4 garlic cloves that I added (but then again, I love garlic!) If you're doing it for a game day situation, I'd do the recipe #2 situation (1/2 a pepper wrapped in 1/3 slice of bacon) to help stretch ingredients, but still use the filling recipe from recipe #1.
Wednesday, September 8, 2010
Tomatillo Avocado Salsa
I'm planning on having a jewelry party sometime in November and like a total food minded person, I'm already scanning my magazines for tasty noms for the party! Last time I had Wheat Thins Tuscan Herb flatbread crackers (OH MY GOSH! So tasty and NO HFCS or hydrogenated oils, only problem is the commissary stopped carrying them!), some alouette brand spinach and artichoke cheese spread, sliced cucumber and carrots, homemade mango salsa (don't ask for the recipe, my friend made it and she's not sharing it unfortunately) and tortilla chips and salsa from the local Mexican market. The spread cost less than $20, and everyone loved everything. This time I wanted to make more of it myself since we won't have guests this time around and I can devote a little more time to cooking or preparing food.
Anyway, I got this recipe from Diet & Nutrition magazine, which is a pretty amazing magazine if you've never heard of it. I made a half batch of this recipe and gobbled it down all by myself. I didn't use the cilantro or the cumin seeds, though next time I make it I'll have to give it a shot!
8 oz tomatillos, papery husks removed, cut into 1/2-inch dice
1 1/2 avocados, pitted, peeled, and cut into 1/4-inch dice
3 scallions, white and light green parts only, minced
1 jalapeno chile, stemmed, seeded if you wish (a must if you don't like it too spicy), and minced
3 tbsp minced cilantro leaves
1/2 tsp sea salt
1/4 tsp freshly ground black pepper
1/2 tsp ground toasted cumin seeds (optional)
1 tbsp rice vinegar
3 tbsp olive oil
To make the salsa, combine all the ingredients except the vinegar and oil in a bowl. Mix well but gently, taking care not to mash the avocado. Whisk together the vinegar and oil until emulsified, and add just enough of this to the salsa to moisten it. Reserve any leftover vinaigrette to use in other salad dressings.
Here is a picture of the finished product:

Now, on to the menu. I'm thinking of getting tortilla chips from the Mexican market, serving this, mango quesadillas, and chicken tortilla soup. Any thoughts on the menu?
Anyway, I got this recipe from Diet & Nutrition magazine, which is a pretty amazing magazine if you've never heard of it. I made a half batch of this recipe and gobbled it down all by myself. I didn't use the cilantro or the cumin seeds, though next time I make it I'll have to give it a shot!
8 oz tomatillos, papery husks removed, cut into 1/2-inch dice
1 1/2 avocados, pitted, peeled, and cut into 1/4-inch dice
3 scallions, white and light green parts only, minced
1 jalapeno chile, stemmed, seeded if you wish (a must if you don't like it too spicy), and minced
3 tbsp minced cilantro leaves
1/2 tsp sea salt
1/4 tsp freshly ground black pepper
1/2 tsp ground toasted cumin seeds (optional)
1 tbsp rice vinegar
3 tbsp olive oil
To make the salsa, combine all the ingredients except the vinegar and oil in a bowl. Mix well but gently, taking care not to mash the avocado. Whisk together the vinegar and oil until emulsified, and add just enough of this to the salsa to moisten it. Reserve any leftover vinaigrette to use in other salad dressings.
Here is a picture of the finished product:
Now, on to the menu. I'm thinking of getting tortilla chips from the Mexican market, serving this, mango quesadillas, and chicken tortilla soup. Any thoughts on the menu?
Giveaway!
The Thrifty Mama is giving away 4 copies of Jillian Michael's 30 Day Shred! If you want instant gratification, it is on sale on Amazon for $8.49, it's eligible for Super Saver shipping, and if you order it now, you can get it in time to join in the fun of the 30 day shred going on with other bloggers.
I haven't been the best blogger, but this month I'm going to try to join in on the blogging fun, so starting Monday I will be definitely posting more often!
I haven't been the best blogger, but this month I'm going to try to join in on the blogging fun, so starting Monday I will be definitely posting more often!
Sunday, September 5, 2010
So, it's been awhile
Summer has been pretty busy for us. My husband has basically been working nonstop, which means little break for moi. Food has been pretty rudimentary, simple grilled protein, rice, and veggies for the most part. I have had a chance to try a few new recipes and I'm very eager to share them with you :)
First, we have cashew noodles with tofu and broccoli. I got this recipe from a Whole Foods "The whole deal" coupon book. I don't go to Whole Foods all that often, but I do know that they have some fantastic recipes in them, and I wish I had found out sooner that they have budget friendly recipes online. Click here for the link. Here's the recipe:
Salt and ground black pepper to taste
1 large head organic broccoli, stemmed and cut into small florets
3/4 lb 365 Everyday Value Wide or Extra Wide Enriched Egg Noodles
3 tbsp 365 Everyday Value Organic Ginger Soy Vinaigrette, divided
3/4 c roasted, unsalted cashews
1 8-oz pkg Thai or Teriyaki baked tofu, cut into 1" cubes
Bring a large pot of salted water to a boil, add broccoli and cook until al dente, 3-4 minutes. Using a slotted spoon, transfer broccoli to a large plate; set aside. Return water to a boil; add noodles and cook until al dente, 7-8 minutes; drain well. Meanwhile, put vinaigrette, cashews and 1/2 cup water into a blender and puree until smooth. Return hot noodles to pot along with cashew mixture, broccoli and tofu and cook over medium heat, tossing gently, until heated through, 1-2 minutes more; transfer to bowls and serve.
Serves 4, $2.77 per serving.
Ok, I'm going to confess right off the bat, I didn't follow the recipe exactly. First of all, I didn't drive all the way across town to get their specific noodles and vinaigrette. I got Drew's brand soy ginger dressing and marinade. I baked my own tofu because I couldn't find it. Sometimes I get myself into situations where I don't think something is too hard and then find myself up to my eyeballs in trouble. This wasn't the case, luckily. I took a pound of extra firm tofu, cut it into slices, and marinaded it in a mixture of 1/2 cup low sodium soy sauce, 1 tbsp honey, 1 tsp yellow mustard, 1 tbsp minced garlic, 1 tsp ginger (I used the dried powdered ginger from the spice aisle, would probably taste awesome with fresh!) for 30 minutes, flipping it over at 15 minutes. I baked it at 350 for about 80 minutes, flipping it every 20 minutes until it got to the texture I liked. This is subjective, and I recommend doing a test batch, but I love baked tofu and will definitely be making this more often.
I didn't like that the recipe has you basically discard the stems of the broccoli. I like to peel it with a potato peeler and slice it into coins, I also peel the stems of the florets, it takes away the tough texture and makes the broccoli a nice soft texture. In a practical area as well, I find it greatly diminishes the likelihood of broccoli farts. I did this while the tofu was baking.
Anywho, I boiled the broccoli, then the noodles. I added the broccoli to the noodles in the big pot I boiled the noodles in. I added the dressing to taste, and when the tofu was done I cut it up into smaller bits and added it. The cashews I sprinkled on top as I wanted (seriously, why get the blender dirty too?) The kids didn't like it very much, and the hubby refused to eat it. For once I was happy with their pickiness, more for me! Here's a picture of the finished product:

There are some more recipes that I've tried that I'll be sharing with you very shortly, but time is short right now, so I've got to go!
First, we have cashew noodles with tofu and broccoli. I got this recipe from a Whole Foods "The whole deal" coupon book. I don't go to Whole Foods all that often, but I do know that they have some fantastic recipes in them, and I wish I had found out sooner that they have budget friendly recipes online. Click here for the link. Here's the recipe:
Salt and ground black pepper to taste
1 large head organic broccoli, stemmed and cut into small florets
3/4 lb 365 Everyday Value Wide or Extra Wide Enriched Egg Noodles
3 tbsp 365 Everyday Value Organic Ginger Soy Vinaigrette, divided
3/4 c roasted, unsalted cashews
1 8-oz pkg Thai or Teriyaki baked tofu, cut into 1" cubes
Bring a large pot of salted water to a boil, add broccoli and cook until al dente, 3-4 minutes. Using a slotted spoon, transfer broccoli to a large plate; set aside. Return water to a boil; add noodles and cook until al dente, 7-8 minutes; drain well. Meanwhile, put vinaigrette, cashews and 1/2 cup water into a blender and puree until smooth. Return hot noodles to pot along with cashew mixture, broccoli and tofu and cook over medium heat, tossing gently, until heated through, 1-2 minutes more; transfer to bowls and serve.
Serves 4, $2.77 per serving.
Ok, I'm going to confess right off the bat, I didn't follow the recipe exactly. First of all, I didn't drive all the way across town to get their specific noodles and vinaigrette. I got Drew's brand soy ginger dressing and marinade. I baked my own tofu because I couldn't find it. Sometimes I get myself into situations where I don't think something is too hard and then find myself up to my eyeballs in trouble. This wasn't the case, luckily. I took a pound of extra firm tofu, cut it into slices, and marinaded it in a mixture of 1/2 cup low sodium soy sauce, 1 tbsp honey, 1 tsp yellow mustard, 1 tbsp minced garlic, 1 tsp ginger (I used the dried powdered ginger from the spice aisle, would probably taste awesome with fresh!) for 30 minutes, flipping it over at 15 minutes. I baked it at 350 for about 80 minutes, flipping it every 20 minutes until it got to the texture I liked. This is subjective, and I recommend doing a test batch, but I love baked tofu and will definitely be making this more often.
I didn't like that the recipe has you basically discard the stems of the broccoli. I like to peel it with a potato peeler and slice it into coins, I also peel the stems of the florets, it takes away the tough texture and makes the broccoli a nice soft texture. In a practical area as well, I find it greatly diminishes the likelihood of broccoli farts. I did this while the tofu was baking.
Anywho, I boiled the broccoli, then the noodles. I added the broccoli to the noodles in the big pot I boiled the noodles in. I added the dressing to taste, and when the tofu was done I cut it up into smaller bits and added it. The cashews I sprinkled on top as I wanted (seriously, why get the blender dirty too?) The kids didn't like it very much, and the hubby refused to eat it. For once I was happy with their pickiness, more for me! Here's a picture of the finished product:
There are some more recipes that I've tried that I'll be sharing with you very shortly, but time is short right now, so I've got to go!
Monday, July 26, 2010
Chicken parmigiana, awww yeah!
My husband has been out of town, so I invited 2 ladies that I know over for dinner, and decided to make chicken parmigiana. Most of the time when I make chicken parm, I'll take some shortcut, whether it be prebreaded chicken or bottled sauce, but this time I decided that I wanted to go all the way. I wanted to make the sauce and the chicken myself. I've been reading a lot lately about the benefits of brining poultry before cooking, the two biggies were that it speeds up cooking time and it almost guarantees (if you don't overcook it) a moist piece of meat. Here's what I did:
1 gallon cold water
1 cup kosher salt
1/2 cup sugar
Healthy sprinkling of Italian seasoning (I like the mixture of basil, oregano, thyme and margoram)
I boiled half a gallon of cold water, the salt, sugar, and Italian seasoning. I let it cool for a little while then added the other half gallon. I poured some of the brine in a ziploc baggie with the 4 chicken breasts I was going to use for the parm and put it in the fridge for at least 30 minutes.
While the brine was doing it's job, I prepared some roasted garlic for the sauce. My base sauce recipe (what I go off of and add to it as I see fit) calls for 2 cloves of garlic, but I think that's really weak! I'd been wanting to roast garlic for awhile, and now that I've done it, I'm definitely doing it more often (after I buy more garlic!) It takes the bite out of the garlic and leaves a deep comforting flavor. Eating a garlic clove would be disgusting, but if it's roasted, you wouldn't have a problem with it!
I took about 3/4 of a head of garlic, cut the bottoms off, and separated it into individual cloves. Then I put in it a pocket of tin foil, drizzled olive oil on it, and closed up the tin foil pocket. I roasted it at 250 degrees for an hour, and when it was done the roasted garlic came out of the paper skin easily.
So, now it's time for the sauce! 2 turns of a saucepan of olive oil, add a few cloves of chopped garlic and 1/2 a yellow onion. Cook over low heat for 15 minutes, don't let it brown! Add 28 oz can of crushed tomatoes, the roasted garlic, and then I like to blend it so I don't have to worry about picky eaters getting mad that I didn't cut the onions smaller (while my eyes are burning and tears are streaming down my face... onion cutting isn't something I like to do!) I then drain a 14 oz can of diced tomatoes (I like the fire roasted ones) and add it to the sauce for texture. Add as much basil as you like (tear it or cut it, I like to cut it into strips myself), salt and pepper.
Now the chicken!
Take your chicken out of the brine and pat it dry. Beat 2 large egg whites, and coat the chicken breasts with the egg whites, then coat in a mixture of 1 cup of bread crumbs (I used panko) and 2 tbsp of Italian seasoning. A little olive oil and a screaming hot pan, 4 minutes on each side. While the chicken is cooking, spray your baking pan with some cooking spray (or coat with oil) and put a little sauce along the bottom. Place chicken in the dish and pour remaining sauce evenly over the chicken. Sprinkle with mozzarella cheese and bake until bubbly, about 25 minutes.
I served mine with garlic bread and spaghetti noodles. My 2 year old was shoving it into her mouth while asking if she could have some of mine. My 5 year old was scarfing it down. Sometimes chicken parm comes out with dry chicken, but the brine really helps.
Shopping list!
Chicken breast
kosher salt
sugar
Italian seasoning
Garlic
Olive Oil
Eggs
Panko bread crumbs
Shredded mozzarella cheese
Onion
28 oz can crushed tomatoes
14 oz can diced tomatoes
Fresh basil
Parmesan cheese
Seriously though, go to the link above (brine's job), there's a lot of good information on brining.
Saturday, May 8, 2010
Vegetarian week
After buying tons of meat at Basha's (they were doing some mega sale, and we ended up getting it basically half off) I decided to do a vegetarian week. For the girls and hubby it was just for dinner, but for myself it would have been all week long. I started by making my own vegetable bouillon. Before you start writing me off as some crazy homemaker, it's easy! You toss veggies and some salt into a food processor (or in our case the vitamix blender) and just pulverize it! Mine ended up a lot less grainy than the ones I saw pictures of, but it was tasty. Next time I think I'm going to leave the cilantro out. Here's the recipe:
http://www.101cookbooks.com/archives/homemade-bouillon-recipe.html
5 ounces / 150 g leeks, sliced and well-washed
7 ounces / 200g fennel bulb, chopped
7 ounces / 200g carrot, well scrubbed and chopped
3.5 ounces / 100 g celery
3.5 ounces / 100g celery root (celeriac), peeled and chopped
1 ounce / 30g sun-dried tomatoes
3.5 ounces / 100g shallots, peeled
3 medium garlic cloves
9 ounces / 250g fine grain sea salt
1.5 ounces / 40 g flat-leaf parsley, loosely chopped
2 ounces / 60g cilantro (coriander), loosely chopped
Place the first four ingredients in your food processor and pulse about twenty times. Add the next four ingredients, and pulse again. Add the salt, pulse some more. Then add the parsley and cilantro. You may need to scoop some of the chopped vegetables on top of the herbs, so they get chopped. Mine tended to want to stay on top of everything else, initially escaping the blades.
You should end up with a moist, loose paste of sorts. Keep 1/4th of it in a jar in the refrigerator for easy access in the coming days, and freeze the remaining 3/4 for use in the next month. Because of all the salt it barely solidifies making it easy to spoon directly from the freezer into the pot before boiling.
Start by using 1 teaspoon of bouillon per 1 cup (250 ml), and adjust from there based on your personal preference.
Makes roughly 3 1/2 cups.
I used the veggie bouillon to make Asian Vegetable Soup. Here's the recipe:
http://kitchen-parade-veggieventure.blogspot.com/2008/04/weight-watchers-asian-zero-points-soup.html
6 cups vegetable broth (I used 6 cups water and 6 tsp of the veggie bouillon)
2 cups bok choy, chopped
2 cups Chinese/Napa cabbage, chopped
4 oyster mushrooms, sliced thin (I used regular old button mushrooms)
2 cups scallions / green onions
8 ounce can of sliced water chestnuts, drained
1 red pepper, chopped
3 cloves garlic, minced (I probably did way more than 3, it's just not enough!)
1/4 teaspoon red pepper flakes (I added these right before I would eat a bowl)
2 cups snow peas (I used frozen like the recipe maker suggested, and they were NOT stringed. Color me upset!)
1 cup fresh bean sprouts
2 tablespoons soy sauce (I used reduced sodium soy sauce)
OPTIONAL BUT TIME-SAVING TIP Bring the vegetable broth (or water for bouillon) to a boil in an electric tea kettle or in the microwave while prepping the vegetables.
Collect all the vegetables except the snow peas and bean sprouts in a cold large pot or Dutch oven. When those vegetables are prepped, add the hot water, cover and bring to a boil on MEDIUM HIGH. Let simmer for about 5 minutes. Add the bean sprouts and snow peas, cook another 5 minutes. Stir in the soy sauce and cilantro.
(And I just want to say that this soup is so tasty, I can barely contain myself to just one bowl!)
Monday night we had "chicken" and broccoli stir-fry. The "chicken" was Morningstar Farms meal starters "chicken" strips. I used PETA's recipe for "beef" and broccoli stir-fry when I couldn't find the "steak" strips. The "chicken" is an interesting flavor, it's not bad. The texture is what did it in though, it's somewhere between chicken fat and chicken meat, and your mouth (and brain) are going, "WTF is this? Spit it out stupid, you shouldn't be eating it!) Served over brown rice, I didn't think it was too bad, but the hubby and kids hated it. Hubby flat out asked me to never make it again (and he usually plays nice when he doesn't care for something.) I liked the vegetables, so I think I might make a smaller batch for myself, and use tofu instead of the "chicken". Here's the recipe:
http://www.vegcooking.com/recipeshow.asp?RequestID=1367
2 Tbsp. soy sauce
1 Tbsp. cornstarch
1 Tbsp. distilled white vinegar
1 Tbsp. minced fresh ginger
1 tsp. minced garlic
1/4 tsp. red pepper flakes
1 lb. veggie beef strips (try Morningstar Farms Steak Strips)
1 small bunch broccoli
2 tsp. vegetable oil, divided
2 carrots, sliced diagonally 1/8-inch thick
1 bunch green onions
3/4 cup vegetable broth
• In a small bowl, combine the soy sauce, cornstarch, vinegar, ginger, garlic, and red pepper flakes. Whisk until combined.
• Toss in the veggie beef and let stand for 10 to 20 minutes.
• Cut the broccoli florets from the stem and slice the stems into 1/4-inch-thick pieces.
• Heat a wok or large skillet over high heat. Add 1 tsp. of the oil. When almost smoking, add the “beef” mixture and stir-fry for 1 minute. Remove from the wok. Add the remaining oil and the vegetables, stir-frying for 1 minute. Add the broth and cook, scraping the bottom, until the vegetables are tender.
• Return the “beef” to the wok and heat through.
Tuesday night we had veggie tacos. Using Morningstar Farms veggie crumbles, they were fantastic! I used the leftover brown rice from the night before, added a can of fire roasted diced tomatoes and a can of drained and rinsed black beans as a side. Everyone was happy.
Wednesday night we had curried rice and lentils. Now, nutritionally, it's fantastic, but it looked like slop, and had texture issues. For the most part, I love when something is supposed to be soft, that it's soft. I don't really care for brownies with chocolate chips in them, I'm a brownie purist, but this recipe really could have done with some textural differences! The flavor was good (left out the onions), but it was too mushy. I think next time we'll cook it for a shorter time. Everyone liked the flavor, just not how mushy it was (and the fact that when it got cold, you could hold your fork up and it wouldn't slide down.) Here's the recipe:
http://www.vegcooking.com/recipeshow.asp?RequestID=1533
1 cup long-grained rice
1 Tbsp. curry powder
3 1/4 cups water
1/4 cup lentils
3 vegetable bouillon cubes
1/4 tsp. garlic powder
1/4 tsp. pepper
1 medium onion, quartered and thinly sliced
• Combine all the ingredients in a slow cooker. Cover and cook on low for 4 to 5 hours.
Makes 4 servings
Thursday we had black bean chili. When cooked, it looked like cat food, which wasn't very appetizing. The girls loved it though, Emily asked if I could make it every day. Kevin said the mushrooms really threw off the texture, and asked that I leave them out next time (which is better than Monday's, "Please don't ever make this again!") I used a red bell pepper instead of green, no jalapenos, and no onions. Here's the recipe:
http://www.vegcooking.com/recipeshow.asp?RequestID=284
1 large onion, chopped
2 cloves garlic, crushed
2-3 tbsp. olive oil
450g mushrooms, sliced
1 green pepper, chopped
1 green chilli pepper or jalapeño, chopped
450g can black beans
450g can crushed tomatoes
50g textured vegetable protein (TVP)
Chilli powder and salt, to taste
• In a large pot, sauté the onion and garlic in the oil until the onions become soft.
• Add the mushrooms and sauté for 5 minutes.
• Add the peppers and sauté for a few more minutes.
• Add the black beans, tomatoes, TVP, chilli powder and salt and simmer for 30 minutes.
Makes 6 Servings
On Friday I made sloppy lentils, a recipe that was shared with me by my friend Dedi. Everyone liked it, Kevin said it would probably be great for homemade pinto beans (which we have a TON of!) Here's the recipe:
http://www.passionatehomemaking.com/2009/10/sloppy-lentils-in-the-crockpot.html
2 cups water (the original recipe uses 3 cups, so notice the change for crockpot preparation!)
1 cup brown lentils, rinsed
salt to taste (optional)
1 cup chopped onion
15 oz can diced tomatoes (drained), tomato sauce or 2 cups fresh tomatoes, chopped
1 (6 oz) can tomato paste, optional (as needed to thicken – especially if using tomato sauce)
2 cloves garlic, minced
1/2 cup ketchup
1 teaspoon mustard powder
1 tablespoon chili powder
3 tablespoons rapadura, molasses, or honey
1 Tbsp white vinegar
salt and ground black pepper to taste
4 hamburger buns, split
cheddar cheese, grated (to top your lentils when serving)
Combine all your ingredients in the crockpot (besides the buns and cheese!). Turn on low and cook for approximately 5 hours, until lentils are tender and the mixture has thickened and absorbed most of the liquids. Serve on open faced hamburger buns and top with melted cheese, as desired.
Saturday we just ordered cheese pizza. Of course everyone loved that ;) I know it wasn't technically a whole week, but that's what we had for dinner. I ate mostly oatmeal for breakfast and the Asian soup for lunch.
Good Hair
I saw this documentary and I have to say I never knew so much work went into a black woman's hair to look the way that most black women have their hair. I have to say I look at hair a little differently. I wonder if some women look at my hair, usually pulled back into a ponytail, and think it's unfair that I have hair that they spend so much money on to get, and don't appreciate it? I remember when I was in elementary school, a black girl named Erica came up to me and started playing with my ponytail. She told me she thought I had nice hair and I didn't think anything of it, but shortly after I realized she'd put glue in my hair! At the time, I was upset, but not super upset. I had thought about doing it back to her, but decided against it, looking back now I'm glad I didn't because I suspect that act would have meant way more to her than it did to me (I just washed my hair in the sink in the bathroom and let it air dry, getting the glue out of her hair would have been a bit more labor intensive since her hair was relaxed.)
I have to say, I was pretty shocked by some of the things in the documentary. Relaxer in kids as young as 3, and then seeing the scientists show what relaxer can do to an aluminum can? Oh my stars! Also, the way weaves are attained? Devout, poor Indians going to temples and giving their hair up to their deity as a purging of vanity, only to have it sold by the temple so it could be processed into a weave. Poor being basically being robbed of a commodity they didn't even know they had! Men stealing hair from women, cutting it while they slept or watched movies. It's awful! Weaves on lay away and credit. It's so sad, you see fair trade products popping up, wonder if you'll ever see fair trade weaves?
That said, I was looking at Perez Hilton today and saw a video of Solange Knowles on Yo Gabba Gabba. She has no wig or weave on, and I'm not sure if she's just opted not to do that anymore or if she just didn't want to wear anything that day. The comments on it are disgusting! Saying she looks like a boy, that she looks ugly, one person said she looks "African"!!! WTF is that about? I don't care what anyone does to their hair, but I have to say, if she's made the decision to stop having wigs and weave, then I applaud her. She's a lovely woman. Tracie Thoms was in Good Hair talking about how revolutionary it is for her to leave her hair alone, the texture it comes out of her head. I don't know if you've seen her, but she's gorgeous! Here's a pic of Tracie (she was in "The Devil Wears Prada" as Lily, Andie's friend, and has a role on Cold Case.)

From the looks of the picture, she's braided it, but that's about it. I think she looks lovely!
Here's the link for the Solange Knowles video. You'll see what I mean about the comments.
I have to say, I was pretty shocked by some of the things in the documentary. Relaxer in kids as young as 3, and then seeing the scientists show what relaxer can do to an aluminum can? Oh my stars! Also, the way weaves are attained? Devout, poor Indians going to temples and giving their hair up to their deity as a purging of vanity, only to have it sold by the temple so it could be processed into a weave. Poor being basically being robbed of a commodity they didn't even know they had! Men stealing hair from women, cutting it while they slept or watched movies. It's awful! Weaves on lay away and credit. It's so sad, you see fair trade products popping up, wonder if you'll ever see fair trade weaves?
That said, I was looking at Perez Hilton today and saw a video of Solange Knowles on Yo Gabba Gabba. She has no wig or weave on, and I'm not sure if she's just opted not to do that anymore or if she just didn't want to wear anything that day. The comments on it are disgusting! Saying she looks like a boy, that she looks ugly, one person said she looks "African"!!! WTF is that about? I don't care what anyone does to their hair, but I have to say, if she's made the decision to stop having wigs and weave, then I applaud her. She's a lovely woman. Tracie Thoms was in Good Hair talking about how revolutionary it is for her to leave her hair alone, the texture it comes out of her head. I don't know if you've seen her, but she's gorgeous! Here's a pic of Tracie (she was in "The Devil Wears Prada" as Lily, Andie's friend, and has a role on Cold Case.)
From the looks of the picture, she's braided it, but that's about it. I think she looks lovely!
Here's the link for the Solange Knowles video. You'll see what I mean about the comments.
Friday, April 30, 2010
ACK! It's been a month!
So sorry for not posting very often, my husband has been on and off work for awhile and it's very nice, but very hectic when that happens. We'd been doing a lot of dining out, which doesn't make for very interesting food blogs (at least not at the places with crayons and kids menus.)
We did go for a date lunch to a sushi place, and had bentos. I love bentos because they're a great way to try a lot of what the restaurant offers, while keeping it inexpensive. I got miso soup, a salad, sashimi (salmon, himachi, and tuna), gyoza, kalbi, and spicy tuna rolls for $13! Bentos are definitely the way to go if you're on a budget but love sushi.
I have so many ideas for things to write about, not just about food, but life in general and different things.
Thursday, March 25, 2010
Tasty vegan pasta dish
Last Friday I took out some tuna steaks to make for dinner, but they didn't thaw in time, so instead I made some egg drop soup, vegan pad thai that wasn't bad, but it wasn't as stellar as I thought it would be (it was a package sauce, served it over rice noodles with tofu), and had TONS of rice noodles leftover. As I tried to find ways to use the rice noodles, I went through my recipes and found this oldie, but goodie. I found it in a book called The Way it All Vegan.
Spicy Garlic Toss
4-6 garlic cloves, crushed (I mince them too)
2 tbsp olive oil
1/4 c water
2 tsp soy sauce (I use low sodium)
1/2 tsp paprika
1/4 tsp dried basil
1/4 tsp dried thyme
1/4 tsp dried pepper
1/4 tsp salt
dash cayenne pepper
In a small saucepan, saute garlic in 1 tbsp olive oil on medium-low heat until garlic is translucent, be careful not to burn. Add water, remaining oil, soy sauce, paprika, basil, thyme, pepper, salt, and cayenne and bring to a boil. Simmer for 8-15 minutes.
I tossed some noodles in the sauce, served it with some marinaded tofu I'd made (I only put half the block in with the pad thai), kimchee for Lana and myself (Lana LOVES the stuff!), peas, and grilled tuna steaks. No one else wanted the tofu, so it was all mine, muah ha ha ha! Kevin had drill and wasn't going to be home for dinner. If not for the tuna and the egg in the soup, it would have been completely vegan! (I know that sounds silly.) Here are some pictures of the dishes:

Egg drop soup. I made this with organic low sodium vegetable stock. It wasn't that good to me, but the girls loved it. Next time I'll probably go with organic low sodium chicken stock, it'll probably be more flavorful.

Vegan pad thai. The girls weren't that into it.
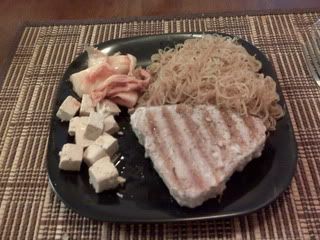
My plate, not enough room for peas, though I had them later. The tofu is the tofu I mentioned in my love of sesame oil post. We use salad plates for meals, so that's why the tuna looks so huge, it's actually only a 4 oz tuna steak.
And the verdict from Lana:


She likes it! Emily and Kevin liked it too. Score one for me against the picky eaters in the family! Woot!
(Btw, yes, that's a vacuum attachment in the pic next to her. We've never used it, and for some reason she loves to carry it with her a lot. She knows it's for the vacuum, but she likes it anyway!)
Spicy Garlic Toss
4-6 garlic cloves, crushed (I mince them too)
2 tbsp olive oil
1/4 c water
2 tsp soy sauce (I use low sodium)
1/2 tsp paprika
1/4 tsp dried basil
1/4 tsp dried thyme
1/4 tsp dried pepper
1/4 tsp salt
dash cayenne pepper
In a small saucepan, saute garlic in 1 tbsp olive oil on medium-low heat until garlic is translucent, be careful not to burn. Add water, remaining oil, soy sauce, paprika, basil, thyme, pepper, salt, and cayenne and bring to a boil. Simmer for 8-15 minutes.
I tossed some noodles in the sauce, served it with some marinaded tofu I'd made (I only put half the block in with the pad thai), kimchee for Lana and myself (Lana LOVES the stuff!), peas, and grilled tuna steaks. No one else wanted the tofu, so it was all mine, muah ha ha ha! Kevin had drill and wasn't going to be home for dinner. If not for the tuna and the egg in the soup, it would have been completely vegan! (I know that sounds silly.) Here are some pictures of the dishes:
Egg drop soup. I made this with organic low sodium vegetable stock. It wasn't that good to me, but the girls loved it. Next time I'll probably go with organic low sodium chicken stock, it'll probably be more flavorful.
Vegan pad thai. The girls weren't that into it.
My plate, not enough room for peas, though I had them later. The tofu is the tofu I mentioned in my love of sesame oil post. We use salad plates for meals, so that's why the tuna looks so huge, it's actually only a 4 oz tuna steak.
And the verdict from Lana:
She likes it! Emily and Kevin liked it too. Score one for me against the picky eaters in the family! Woot!
(Btw, yes, that's a vacuum attachment in the pic next to her. We've never used it, and for some reason she loves to carry it with her a lot. She knows it's for the vacuum, but she likes it anyway!)
Tuesday, March 23, 2010
Freebie I wanted to share!
On free pastry day at Starbucks and free cone day at Ben & Jerry's, both of which I can't or won't do (gave up Starbucks for Lent and B&J's is 30 miles away!) I figured I'd share a freebie that was good for you! Subway and the Biggest Loser have teamed up and released a FREE workout mix. So those of you looking for good music to work out to, here you go! Here's the list of songs:
Leona Lewis - Bleeding Love
Estelle w/ Kanye West - American Boy
Rihanna - Umbrella
Kanye West - Stronger
Madonna - 4 Minutes
Taylor Swift - Love Story
Daughtry - No Surprise
Flo Rida - Sugar
Lady Gaga - Paparazzi
Pussycat Dolls - When I Grow Up
Shinedown - Second Chance
Danity Kane - Damaged
I think most, if not all, aren't sung by the original artists (I know the Flo Rida one isn't, it's sung by a woman on this file!) It's a zip file of mp3s, so ready for putting on an Mp3 file.
Go HERE to download.
Thanks to The Thrifty Mama for posting this awesome freebie and others!
Monday, March 22, 2010
Fishy, fishy, fishy!
We've always had a love of "Finding Nemo" in our house, it's a great movie if you haven't seen it (and where the heck have you been? OMG!) Emily, my oldest, had been talking for a long time about wanting a fish, so after a month of good behavior (she REALLY wanted that fish!) we got her a betta. His name was Boots (well, both of them, the first one died the first day) and he was passed on to a friend to care for when we moved cross country. When we were settled, Emily started talking about wanting a fish tank again. Well, we got this lovely Tetra 10 gallon half moon tank, it's pretty freaking cool. You can sit across the room and see the fish, even small ones, flitting around because of the magnifying effect. It was on sale at Petco when we got it, so it wasn't too expensive. We got it set up, and 5 days later got our fish, which Emily chose. We first got a Mickey Mouse platy (named "Oh Toodles"), a marigold swordtail ("Goldie"), and a sunset fire platy ("Blaze"). We get home, let the little fish bags bob around in the water for the 15 minutes, and then let them go at it.
4 hours later we were back at Petco... "Oh Toodles" had died. Emily wasn't too distressed. We got another Mickey Mouse platy (named "Toodles" this time), a Chinese algae eater (named "Doo doo boy"), and a black Molly (named "Molly", creatively enough.)
2 1/2 hours after that, we were back... Goldie was a bully. She was picking on all the fish, including the algae eater which was so not cool to me. We exchanged her for a red platy (named "Rocket").
4 days later, we were back, Molly died. We got a blue platy to replace her, which Emily named "Dora" (she's the culprit behind these names btw! I know, I know, you totally thought I was the one that came up with "Doo doo boy".) The Petco employee told us Dora was a girl, showed us how to tell the sex on the platys, and I was excited to use this knowledge. Well heck, all of our other fish are boys! Bow chicka wow wow, right? Wrong, Dora was already knocked up! I looked it up, and found that platys get a gravid spot when they're pregnant, and she had it ever since we had her. I have to wonder if this is some sick joke that God is playing on us because I said there would be a prego in our house again. Good one God, thank you that it's the fish and not me!
Anywho, fast forward to today, Toodles died. Emily was upset because he was sucked up against part of the filter, she was afraid he was stuck and scared (who knows, maybe he got stuck and had a heart attack?) I posted it on facebook and a friend from high school told me not to go back to Petco. Taking his advice, I went to Petsmart with a water sample, thinking it's either crap water, or crap fish (and all this time we'd been getting the water tested and Petco told us it was good!) Well, it was bad, really bad! Ammonia levels were high, nitrates and nitrites, the works. I was upset. The girls take the death of the fish rather well (too well sometimes), but I just don't like having them die all the time, it stinks!
I talked to the manager, and she told me that the ammonia problem could be from too many fish in the tank (not the case with 5 fish in a 10 gallon tank) or overfeeding. I blushed, Kevin's been on me saying I'm feeding them too much (once a day, but the amount is the problem.) She said to put in some food, let them eat for 2 minutes, then scoop out whatever hasn't been finished with the net. She said to do a 25% water change with the treated water (with special drops to neutralize the ammonia, nitrates, nitrites and other baddies in the water). Change the filter. We did all that, and she said we should see an improvement in a few days (the fish haven't been sluggish).
The water change went well, we scared the crap out of Rocket, but I think he's ok, he likes to hide in the plant. We're going to set up an air stone in a volcano, so we'll have our own Mount Wannahockaloogie just like on Finding Nemo (Sharkbait, Oh ah ha!) The manager said that the air can help raise the oxygen levels in the water, and my friend from high school (who's been breeding fish since 4th grade) said it "assists in the development of aerobic bacteria that digest waste". Ok, good to know I wasn't taken for a ride by the Petsmart manager (I'm totally gullible at automotive shops too, which is why the hubs takes the cars in for the major stuff!) I have to go back tomorrow and get an air pump because our tank didn't come with one (I already bought Mount Wannahockaloogie, the T valve and hosing for the pump. I called Petco while I was at Petsmart and asked if the air pump came in the tank, stating I wasn't at home and couldn't remember, and they said yes. Bung holes!)
So, anyway, pray for Dora, her fry, Blaze, Rocket, and Doo Doo Boy. We'll be adding a catfish as soon as the levels are good (great thing about Petsmart, they say you need to bring a sample of the water before you buy the fish, nice!) because they'll help keep the uneaten food at bay. Interestingly enough, platys are liverbearers, so they give birth to babies instead of laying eggs. Dora's belly will get very square shaped and she'll be sluggish and hang out at the bottom of the tank before giving birth (this will be my signal to put her in a tank by herself to have the babies to increase their chances of survival.) I thought that was pretty cool!
Saturday, March 20, 2010
Are there really only two choices in Hollywood?
So, Gabourey Sidibe was nominated for Best Actress for the Oscars (lost to Sandra Bullock), and people are all atwitter with the talk of the size in Hollywood on boards that I read. Someone said it's nice to have a change from the anorexic supermodel sized norm, but I don't think this is much better. Gabby is my age, yet she is so unhealthy looking. I agree that supermodel size norm is damaging to girls, but showing them morbidly obese alternatives is just as damaging. Instead, we need to be focusing on eating healthy, watching portion sizes, staying active, and not overindulging. It's not about hatred of fat people, it's not being sizist your mean, it's about wanting people to take care of themselves. I think telling people, "Oh, it's ok, yeah, go for that huge 1000 calorie piece of chocolate cake, and eat it all by yourself!" isn't right. It's setting people up in the worst way. It makes me sad that the average overweight peerson only sees 2 options, and since they "can't" (aka don't want to for the most part) eat healthy and exercise, they'd rather do nothing and stay overweight.
Kale chips
I, like most moms I'm sure, have a hard time getting my kids to eat their veggies. I puree them and add them to recipes, allow them to be dipped in organic ketchup (shudder!), ranch, whatever, just eat them. I found this recipe for kale chips and was intrigued. It's a simple recipe, oil, kale, vinegar, and the oven, but it had me wondering how good they could be. I bought some kale, and divided one bunch into 3 batches. 1 batch was olive oil and salt; 1 batch was olive oil, salt and apple cider vinegar; and the last batch was olive oil, salt, and garlic mustard aioli spread from Trader Joe's. They all came out pretty good, the girls went gaga for them, and I watched as they munched on kale with a little evil giggle going on inside. Emily asked what they were, I asked what she thought they were, and she said garlic chips. I said, ok, that's what they are. Do I regret it? Not really, I'm not sure if she would have decided against eating more if she had known it was kale (which she doesn't know what it is) but I wasn't taking the chance, this kid loves garlic! Today I'm making more, I'm going to try an Asian twist on it with garlic, sesame oil, soy sauce, salt, and red pepper flakes. I'll let you know how they turn out. In the meantime, here's the recipe:
Fresh kale - at my grocery, 3 bunches weigh a pound
Olive oil - allow about 1 tablespoon per pound of kale
Apple cider vinegar or mustard - allow about 1 tablespoon per pound
Kosher salt
Preheat the oven to 375F, 400F, up to about 450F. The higher the temperature, the faster the roasting. Cover a rimmed baking sheet with foil.
Under running water, wash each kale leaf carefully, splaying the leaves to get into the crevasses. Arrange in a single layer on a double layer of paper towels. When the paper towels are completely covered, put another paper towel on top and press gently to remove as much water as possible. (See TIPS.)
In a bowl, mix the oil and vinegar or mustard. Add the kale and loosely swirl the leaves around to distribute the oil mixture. With your hands, rub the leaves together, the objective is to cover every bit of leaf with the oil and mustard/vinegar, working the oil into the leaves. Arrange the leaves in a single layer on the baking sheet. "Rain" with salt -- be generous!
Bake for 5 minutes to start, then stir around and bake for another 5 or 10 minutes. We like the kale best when it's still quite green but with some salty crispiness versus completely crispy. Tastes may vary so taste as you go along! Serve hot! Savor!
NUTRITION ESTIMATE
(How many calories in Kale Chips? How many Weight Watchers points in Kale Chips?) Assumes that 1 pound serves 8, Per serving: 44 Calories; 2g Protein; 2g Tot Fat; 0g Sat Fat; 6g Carb; 1g Fiber; 337mg Sodium; 0mg Cholesterol; Weight Watchers 1 point
http://kitchen-parade-veggieventure.blogspot.com/2010/03/crispy-salty-kale-chips.html
A thought on eating healthy
I've heard so many people saying they can't eat healthy because it's so expensive. Ok, first off, it's not that expensive. If you start with just watching your portion size, you'll be amazed at how far your money can go! Most bagged chips, for example, have at least 18 servings in them. Instead of buying 100 calorie packs, get a $3 bag of the chips, some ziploc bags, and portion them yourself. I believe if you pay attention to how much you're eating, your food budget will go down, and you can then afford to buy better food.
(I realize that chips aren't healthy, but I firmly believe that you have to start somewhere when going on a diet or resolving to eat healthy, and portion control is a good place to start!)
(I realize that chips aren't healthy, but I firmly believe that you have to start somewhere when going on a diet or resolving to eat healthy, and portion control is a good place to start!)
Friday, March 19, 2010
Trader Joe's
I'm falling head over heels for this store. I've made some really delightful product discoveries, and I hate to think what would happen if I couldn't get to one to get their graham crackers! Things I love from them:
I love that they have organic chocolate syrup (without creepy chemicals) for $3 (really, not that much more expensive than Hershey's, but it tastes amazing!)
I love their graham crackers, they're cinnamon, they taste like they were actually baked not too long ago, and if you don't eat them for awhile, they go a little soft, which tells me they don't have tons of creepy chemicals (and they don't have HFCS, which is almost impossible to find a regular grocery store! Wait no, it was impossible to find in Giant Eagle, Walmart, and Kuhn's back in Pittsburgh!)
They have this garlic mustard aioli that is so scrumptious! I like to put it in egg salad, in grilled cheese sandwiches, use it as coating for bread crumbs on chicken, in a regular old sandwich, it's quite versatile in my mind. Garlic is always welcome in my house!
They have these cheese straws that are phenominal. Have you ever put cheese on a baking sheet to make these little cheesy crispy chip like things? The edges are all browned and super cheesy tasting (it's like with the oil baked out, there's nothing but cheesy goodness!) They taste like that! So scrummy!
I do have one bone to pick. The one near us does not have rice noodles. I went to Trader Joe's to pick up some shampoo and other things, and was crushed because I needed them for dinner. I had to stop at the commissary on the way back home, which isn't too bad, but the kids were hungry, I was hungry, so we ended up tossing Snikiddy cheese puffs (gluten free, no HFCS, no MSG, no hydrogenated oils or preservatives and pretty tasty!) and Alexia onion strips along with the tofu and rice noodles we needed. I don't know how they can claim to have a proper gluten free section without rice noodles. Not break up worthy though!
Sesame oil - LOVE IT!
One of my fave ingredients to work with is sesame oil. It's funny because I don't particularly like sesame seeds in my food (unless it's furikake, then it's all good!), but I really love sesame oil. It lends a distinct flavor, you don't need to use too much, and it adds a bit of Asian flare to just about any dish.
Tonight I made vegan pad thai with tofu (the pad thai was a packaged sauce from Fresh & Easy) served over rice sticks, and egg drop soup for the girls. I only used half the block of tofu because the package of sauce was small and I wasn't sure the girls were going to like it (hence why I made the egg drop soup as well.) As I cubed up the tofu, I found myself wondering what to do with the other half, and then I decided to marinade it in soy sauce, sesame oil, apple cider vinegar (rice wine would have been more traditional Asian, but I didn't have any on hand), and chopped garlic (with a marinade you don't have to chop too much, I sliced it.) I did equal parts soy sauce (low sodium), sesame oil, and apple cider (2 tbsp each) and filled the rest of the jar with water. I snuck a few pieces (about 4 hours into the marinade) and it was delightful! I added some salt to it, and green onions and red pepper flakes would have just made it, but I don't have any green onion and I'm hoping Emily will want to try some of it, so I'm leaving the pepper flakes out.
You can use sesame oil in salad dressings, to fry food in, as an addition to crab rangoon mixture (which btw, are very easy to make, and you can actually have, gasp, crab in it! I do so love when a restaurant is honest and just calls them cream cheese puffs though!) Here's a delectable little recipe that I want to try very badly (leaving out the ginger, not a fan of that unless it's in a cookie!)
http://www.foodnetwork.com/recipes/guy-fieri/korean-chicken-wings-recipe/index.html
Thursday, March 4, 2010
Expensive carriers suck!
I'm a carrier afficiando. I love them, always have. Slings, soft structured carriers, pouches, oh I'm in heaven! I've often stopped moms in malls and corrected bad usage on bad carriers (Baby Bjorns, Infantinos, Snuglis, ALL SUCK!) It doesn't make them all that much better, but if it gets a kid out of their bucket seats and some contact with mom, I'm all for it. I want that experience to be a comfortable one so that mom won't chuck the carrier in the closet and forget about it's back tiring experience.
That said, there are a lot of craptastic slings that are way overpriced. Here's one for example:

First of all, let's start with the price. Last I saw, it was on sale for $60 from $100, but still, this is a carrier you can only use for 3 months. That's ridiculous! Add that to the bucket carseat price (which really isn't necessary, you can use a convertible carseat for a baby!**) and no wonder people think kids are super expensive!
Second of all, look at the people in the picture. Yes, I know they're models, but still, that woman has a look on her face like, "I'm trying not to look uncomfortable, put on a happy face!" Also, it seems she feels unsure because she has a hand behind the baby's head to support it (in spite of that huge head rest) and a cautious hand on her hip, ready to catch a falling baby. To me the baby looks uncomfortable, and a little lost in all that crap (could it have more buckles?)
Third of all, what's with the design of it? Crossing guard chic anyone? Is this to show that moms can have a career and bring baby with? It is so ugly.
** I realize that some babies are small and require infant carseats, but some, like my 2 girls, didn't, they were on the big side at 7 lbs 15 oz and 9 lbs 13 oz.
That said, there are a lot of craptastic slings that are way overpriced. Here's one for example:
First of all, let's start with the price. Last I saw, it was on sale for $60 from $100, but still, this is a carrier you can only use for 3 months. That's ridiculous! Add that to the bucket carseat price (which really isn't necessary, you can use a convertible carseat for a baby!**) and no wonder people think kids are super expensive!
Second of all, look at the people in the picture. Yes, I know they're models, but still, that woman has a look on her face like, "I'm trying not to look uncomfortable, put on a happy face!" Also, it seems she feels unsure because she has a hand behind the baby's head to support it (in spite of that huge head rest) and a cautious hand on her hip, ready to catch a falling baby. To me the baby looks uncomfortable, and a little lost in all that crap (could it have more buckles?)
Third of all, what's with the design of it? Crossing guard chic anyone? Is this to show that moms can have a career and bring baby with? It is so ugly.
** I realize that some babies are small and require infant carseats, but some, like my 2 girls, didn't, they were on the big side at 7 lbs 15 oz and 9 lbs 13 oz.
Ergo Carrier - LOVE IT!

I'm in love with a great many carriers, but if I had to pick just one out of my stash, this would be the one. I have a bad back from some car accidents when I was younger, and once my kids got to be a little weighty I required 2 shoulder carriers for longer trips (quick trip into the store for milk was ok with just a sling, but anything much longer needed 2 shoulders). I got the Ergo when I was pregnant with my youngest, pulled a muscle in my belly carrying my then 2 1/2 year old oldest, and my husband needed something to carry the oldest in (the mei tai I was using didn't fit him.) We bought the Ergo and it works great, I've stolen it for myself :)
One thing that's great about it is it's ergonomical, so those with bad backs can rock out in the carrier for a long time. We used this at Disney World with my 28 lbs 19 month old for a week and while my knees hurt from all the walking, my back was great (and the little one didn't want to be in the stroller AT ALL, so it's not like I got much of a break during that time.)
It's fairly easy to nurse in, check this pic out:

If you're not in a nursing top (or have a cardigan) you get a little side boob showing, but that's it.
You can pop the kid on your back or hip if you want, very easily. Only 2 buckles to worry about!
Here's their website for more info:
http://www.ergobabycarrier.com/
Chocolate Milk
My oldest loves chocolate milk (as I'm sure every child does), and I was recently looking at single serving chocolate milks for her to have as a treat. I looked at the ingredients on Nesquik and saw high fructose corn syrup, so I went off in search of a suitable alternative.
Inexpensive: Great Value is cheaper than Nesquik and has no HFCS.
Organic Cow Milk: Organic Valley and Horizon Organic both have organic vanilla, chocolate, and strawberry milks that contain no HFCS.
Soy: Silk and Kirkland brands have single serving flavored soy milks that contain no HFCS. Zen Soy is another brand that has single serving flavored soy milks, but this brand has a screw top (no more squirting soy milk all over the place when they're walking around!)
Fancy: If you can find it, flavored (and unflavored) almond and rice milks (I've yet to find single serving sizes, although my 4 year old swears the big cartons ARE single serving sizes) are very delicious and contain no HFCS. I hear that Whole Foods sells single serving sizes of rice milk, not sure about almond milk though.
Subscribe to:
Posts (Atom)